2024 Guide to Backpacking Photography

What is Backpack Photography?
- You sleep on the ground
- It can be cold / hot / mosquitos / raining
- No shower for days
- Things may break. You may break.
- Ask me about my hernia…or not.
- Opportunistic photography
- If you can get the shot – great – otherwise hike on.
- No porter carries your stuff.
For me, Backpack photography is
“Opportunistic Photography.”
The hike comes first. This activity is not for everyone. Compared to my friends that also hike, I’m sort of middle of the pack. Others do less stupid things and they have really good hiking experiences.
If you see something here that needs more explanation, just send me a note! I’ll either give you more info or update the blog. Or both.
Outline
- What you bring
- PHOTOS!
- Taking, Storing & Sharing
So this is going to cover a batch of things about both hiking and photography.
Typical Hike
- 4-9 days on / off trail
- High Sierra
- Sleep most nights above 10K feet
- 5-8 hours per day hiking
- 2-4K feet elevation change/day
- 35-40 pounds on back at start
- 3-5 people
- more fun and safer
So what do **I** mean by a hike. It’s not a walk around the block. It’s some serious up and down. There was a hike we took last summer – off trail near Bishop in the high sierras. I’m going to use that as my example hike throughout this talk.
It ended up being 6 nights, 7 days hiking. 3 of us (Pat, Scott and me). We slept most nights above 11K feet. Total distance was 60 miles and we did 30,500 ft ascent in those 7 days
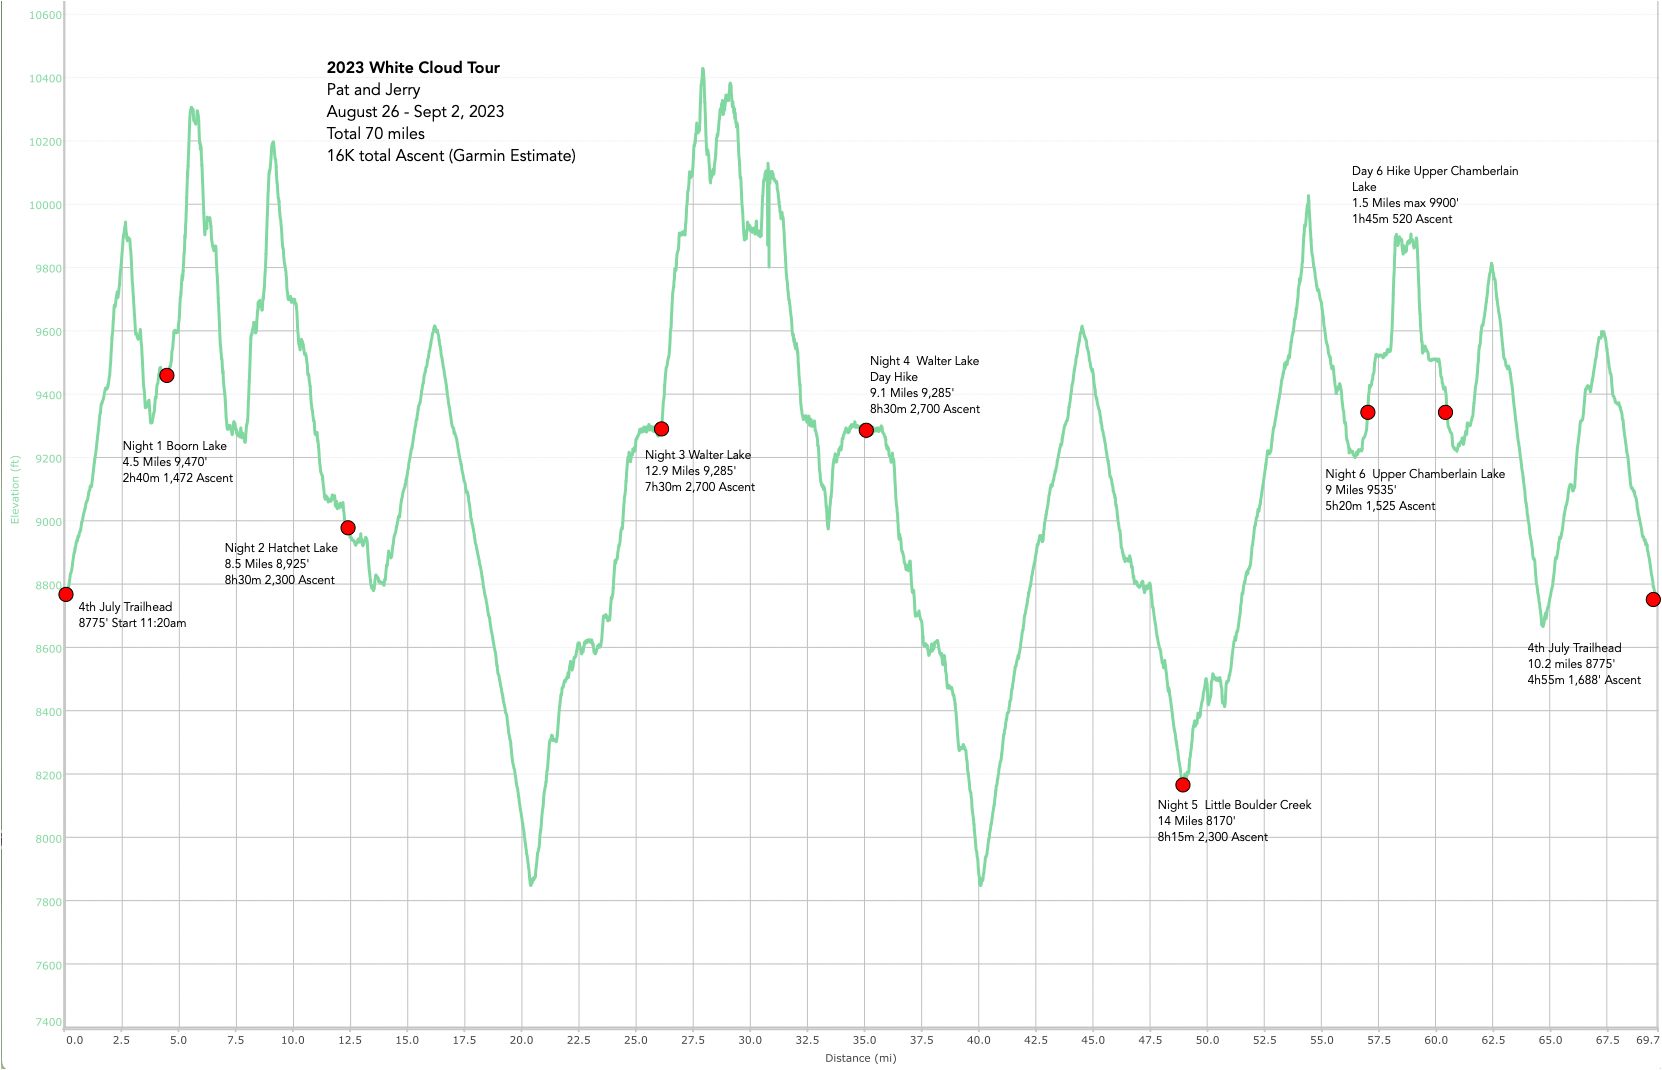
This is the altitude vs distance profile of another hike – this one in Idaho in the White Cloud mountains. Lots of off-trail.
One thing to note about these hikes is the huge temperature shift. It’s common to get up to over 90° while hiking and down to 25° in the morning. 70° variation over the day.
What You Bring - It’s all about the weight…
Every Ounce Counts …
- Overview
- Clothing
- Food, water, cooking, sleeping
- Electronics and camera
What you bring … You need creature comforts, but not at the expense of weight. I used to bring a Kindle, but found that it weighs too much for the benefits. If items can have multiple uses, that’s great. It really is that EVERY OUNCE COUNTS! I’ll do a lot to save a pound, except go on a diet before a hike…
Below are the TMI details of what I bring. But in case you don’t care about the style of underwear I bring – here is the summary.
I carry 7+ pounds on my body – mostly heavy shoes.
My base weight – what I need to go out on the trail is just under 20 pounds. My sleeping system (including air mattress) is the heaviest, followed by backpack and clothing. I used to bring a very heavy (3 pound) camera, but I’ve moved to a midsize camera.
Add to the base weight the bear canister (required in the High Sierra) and a chair (well we NEED our creature comforts!) and my new base weight is REALLY 24 pounds.
But you need water, food and common gear which adds another 14 pounds. So it’s up to 35 pounds. Not a light load.
So now continue on to see all the details…
| Pounds Actual | |
| On Body | 7.3 |
| Clothing in Backpack | 2.02 |
| Puffy Coat | 0.66 |
| Wet Weather Gear | 1.37 |
| Tent | 1.74 |
| Backpack | 3.22 |
| Sleeping Bag Stuff | 4.07 |
| Water Gear | 0.63 |
| Poop Gear | 0.25 |
| Personal Food Stuff | 0.54 |
| Personal Toiletries | 1.34 |
| Electronics | 1.18 |
| Non Electronics | 1.32 |
| Camera | 1.7 |
| Base Weight: | 20.03 |
| Optional | 1.81 |
| Not Likely | 1.32 |
| Base Weight | 23.16 |
| Group Gear (assuming 4 people) | 1 |
| Food (4 days) | 4.33 |
| Water (2 liters) | 4.42 |
| On Back at start: | 32.9 |
Below are the details. You might want to jump to the next page and skip the details…
Clothing (to wear) on-trail range of 35°F to 100°F (2°/38°C)
What’s on my body…
When thinking about buying stuff my first go-to place is https://www.outdoorgearlab.com/ They have great real-world reviews of hiking stuff.
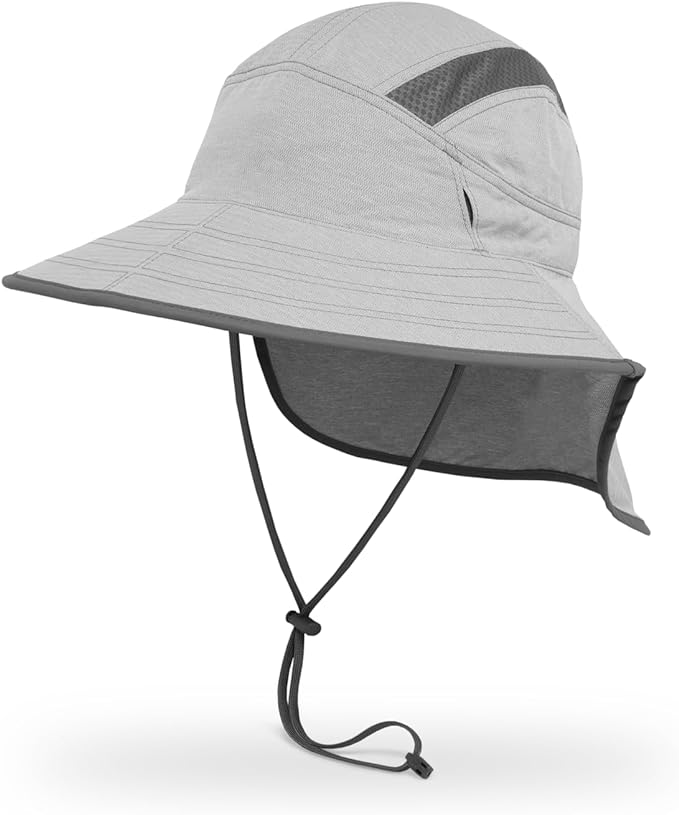
It’s just a hat – well no. My latest hat is the Sunday Afternoons Ultra Adventure Hat. I add a leash (string with a clip). The brim is somewhat stiff and has a fold on the front that makes it much better in the wind.
I add a very thin headband (since I tend to sweat like a stuffed pig and it helps keeping sweat out of my eyes). I don’t put any sunscreen on my head while hiking and use the hat to protect my skin.
Amazon Link
My hiking shirt is ALWAYS long sleeve. KUHL Engineered Hoodie has been my favorite for a while. I think it’s better to keep the sun off and is cooler when sweating. I got mine at Trading Post in Redwood City.
My zip off pants are the KUHL Renegade Convertible Pants – Men’s. They are a bit heavier than the REI pants and I like that for cold weather warmth and protection against rocks/brush. I modify them to not need a belt. I do change in diameter during long hikes so I need to keep them up, but I don’t like a belt across by back while having a backpack on. I get mine at REI.

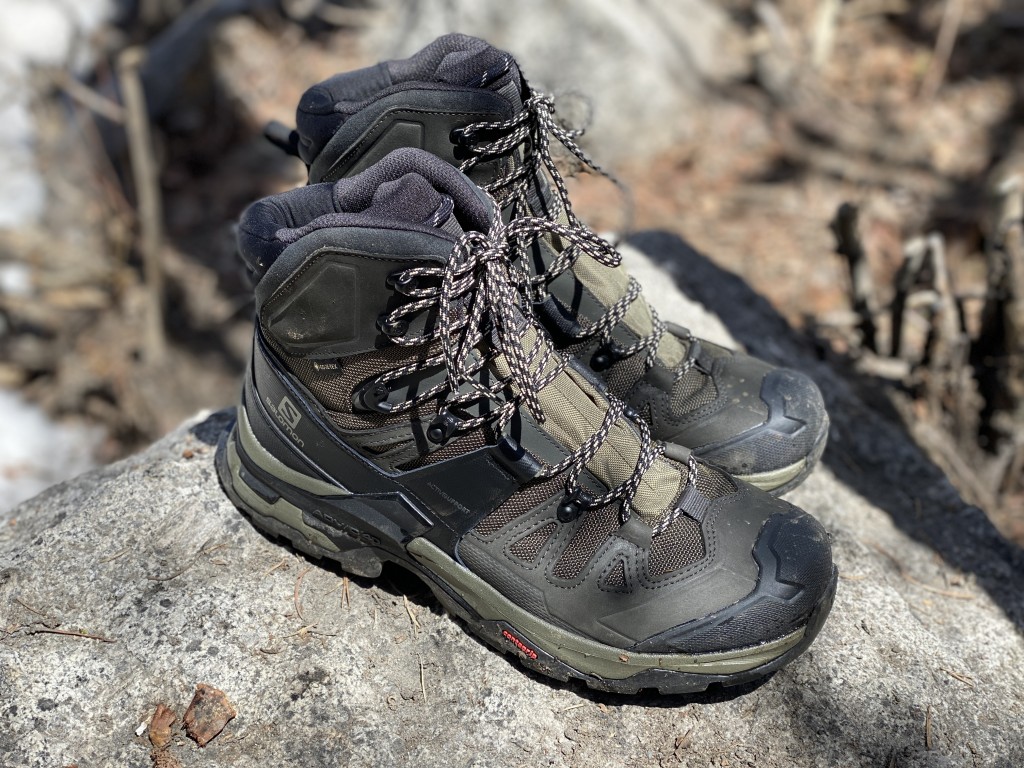
My boot is Salomon Quest 4 Gore-Tex I get mine at REI. They are expensive and heavy BUT they are really waterproof and with good ‘stick’ for walking on granite.
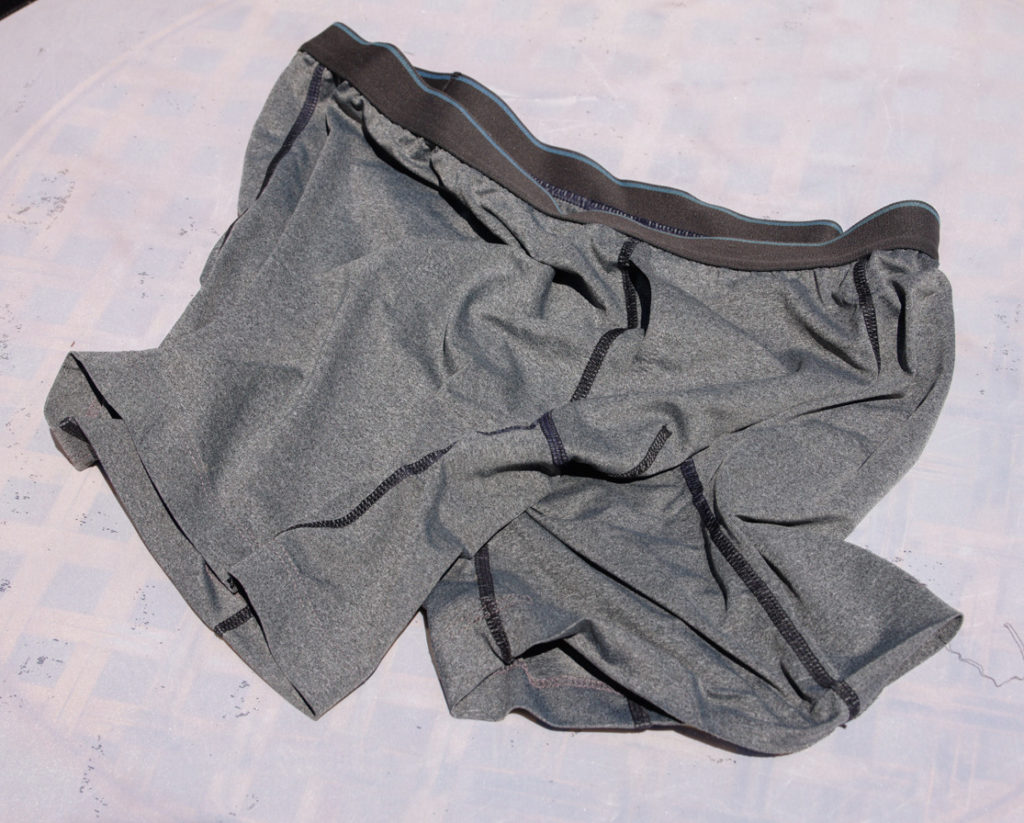
Undies need to be able to get wet and dry quickly. Used as swimming pants (when not skinny dipping) (I bring a total of two pairs for every hike)
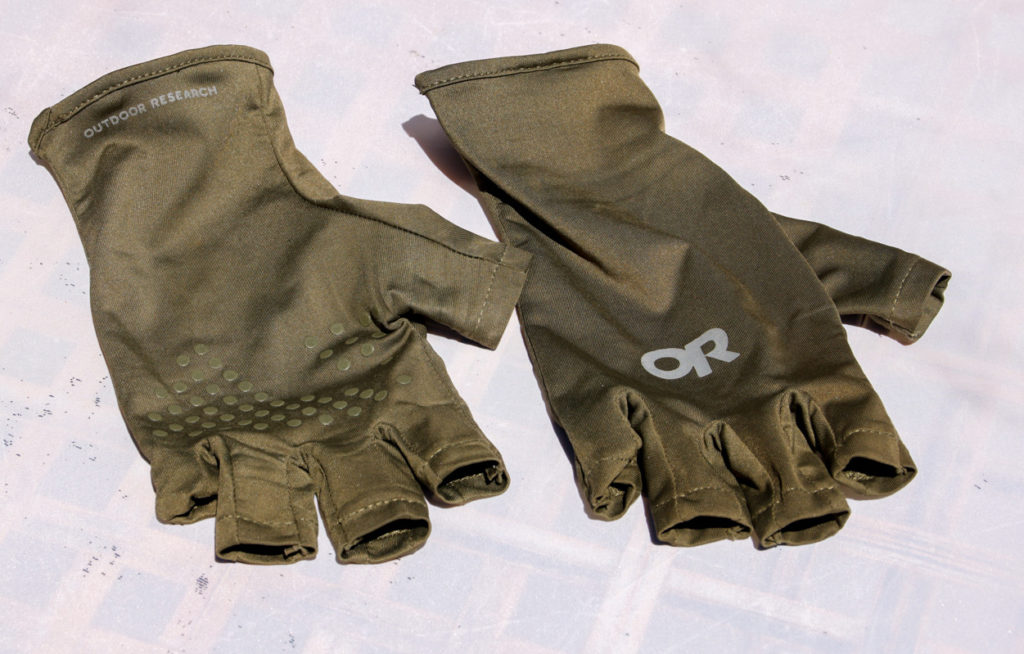
Sun / hiking gloves are a must have! They protect against abrasion for hiking poles, protect against the sun and are used to help rock hopping. They don’t last long (maybe two seasons if you are lucky). I get Outdoor Research Sun Gloves from Amazon
Thin gators to keep small rocks and sticks out of my shoes have become essential. I’ve moved away from Dirty Girl gaiters (I don’t like the front hook) and now use ankle gaiters by Ultragam (fancy colors!) https://www.garagegrowngear.com/products/ankle-gaiters-by-ultragam?variant=43851208917179
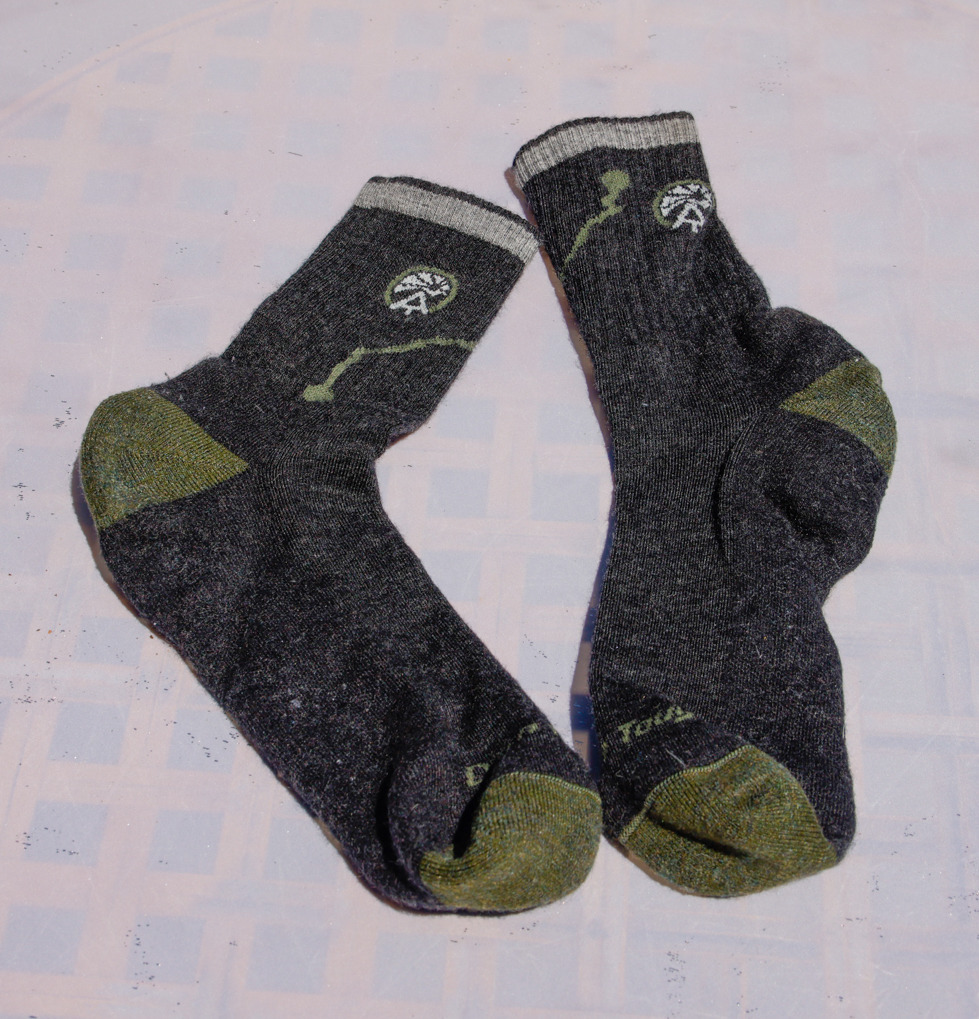
Hiking socks are so important. It’s key that you get the right thickness and they last. I’ve been using Darn Tough for a while and love them! https://darntough.com (I bring a total of 3 pairs on every hike)
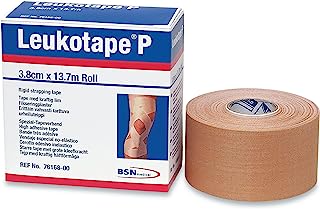
Hiking poles are also a necessity – especially as we get older for stability, river crossings and extra lift going up/down hills. Costco carries the Cascade Carbon Fiber trekking poles (as does Amazon). They only last about 2 seasons – the tip wears out! We add a yard or so of duct tape and Leukotape JUST to have a place to carry it. BTW Leukotape is a pre-blister protection. You NEED Leukotape.

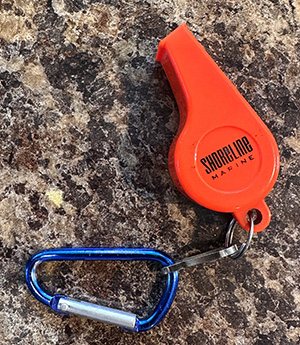
Whistles are a safety net for safety. I carry one clipped onto my pants. This way every time I’m out of the tent I have the whistle with me.
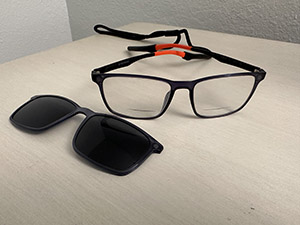
I’m of the age that needs reading glasses. Normally I just wear progressive glasses, but for hiking I have moved to bifocal glasses with a very small reading-glasses section and the glasses darken in the sun. I also have a clip-on polarized dark glasses. I CAN’T wear progressive glasses while rock-hopping. It just doesn’t work. These are really good for on-trail, but not as good for in-camp so I bring an old set of progressive glasses for in-camp. It just works!
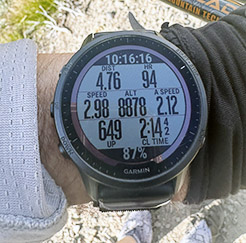
I have a Garmin 955-solar watch. (I would NOT buy the solar again – not worth the extra $100.) I love the buttons, battery life and information display. I tried an early Apple Watch – didn’t cut it at all. Maybe the new Ultra is OK, but I’m very happy with the Garmin and the data screens that I use. I need to recharge every night (or every other night), but it works!
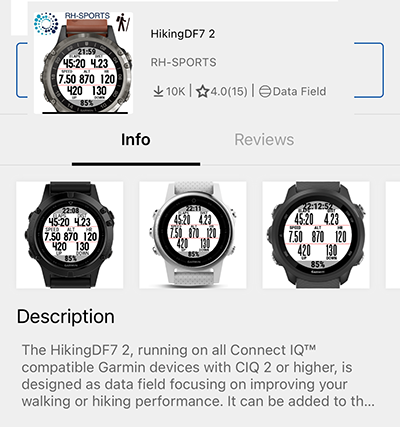
I should point out that I use one of the data fields that you can get from the Garmin shop. I use the “HikingDF7 2” from RH-SPORTS (search for it). I paid about $7 to get full access and it gives me the information at a glance that I really like. It took a while to set everything up, but worth it! Garmin was bad at the distance estimate, but seems to be better now. Same with the current altitude – it used to be off by as much as a few hundred feet, but now closer to the lines on the topo and the other GPS devices I have.
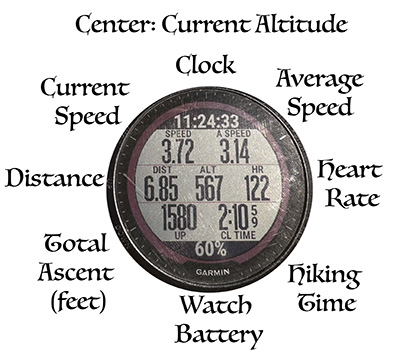
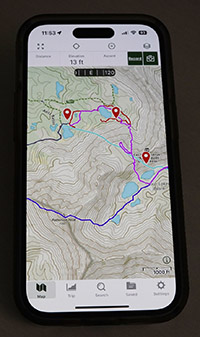
The most important piece of equipment is the iPhone. I have an iPhone 14-pro and it works just fine. I use it all day for GPS tracking, navigation, link to my camera for GPS, etc. It needs to be recharged every night, but it works! The iPhone 14 gives me added satellite connection in case of emergency. I carry it in my front pocket and have a grippy case on the phone. I have added a connector cover to keep lint out of the bottom connector hole.
| Bring | Actual | ||||
| On Body: | Grams | Pounds | Ounces | ||
| Hat (and leash) | 1 | 79 | 0.17 | 2.8 | 0.17 |
| Headband | 1 | 11 | 0.02 | 0.4 | 0.02 |
| Long sleeve shirt – Kühl | 1 | 219 | 0.48 | 7.7 | 0.48 |
| zip off pants – Kühl | 1 | 503 | 1.11 | 17.8 | 1.11 |
| High top hiking shoes – Solomon | 1 | 1,460 | 3.22 | 51.6 | 3.22 |
| Undies | 1 | 75 | 0.17 | 2.6 | 0.17 |
| Hiking Gloves – OR | 1 | 21 | 0.05 | 0.7 | 0.05 |
| Ankle Gaiters by Ultra Gam – GarageGrownGear | 1 | 40 | 0.09 | 1.4 | 0.09 |
| Socks – Darn Tough | 1 | 65 | 0.14 | 2.3 | 0.14 |
| Hiking Poles (CostCo w/ Duct Tape and Lucco tape) | 1 | 485 | 1.07 | 17.1 | 1.07 |
| Bifocal Glasses and Dark Glasses | 1 | 38 | 0.08 | 1.3 | 0.08 |
| Whistle | 1 | 20 | 0.04 | 0.7 | 0.04 |
| Garmin Watch – Forerunner 955 | 1 | 41 | 0.09 | 1.4 | 0.09 |
| iPhone 14 Pro | 1 | 251 | 0.55 | 8.9 | 0.55 |
| Total: | 3,308 | 7.3 | 116.8 | 7.3 |
Need to cover an EXTREME temp range (can add layers)
NO SHORTSLEEVE SHIRT
A shirt is cooler than skin
Protects from sun
Zip off pants
Shows off cute legs for on-trail style
Phone is for navigation
Bottom line: 7.3 pounds on my body. This is separate from my backpack.
I generally zip off the pant legs to make them into shorts. I try and cover as much of my skin as possible against sunburn and sweat is your friend in keeping you cool.
The heaviest weight is the high top waterproof hiking shoes. The PCTers (meaning Pacific Crest Trailer hikers) do about 25 miles a day and they wear running shoes to keep the weight down, but off trail you need the ankle protection and waterproof, hence the weight. This doesn’t include the 10 pounds of fat on my body. But that will be gone by end of summer.
Clothing – In Pack
25° to 100°F (-4°/38°C)
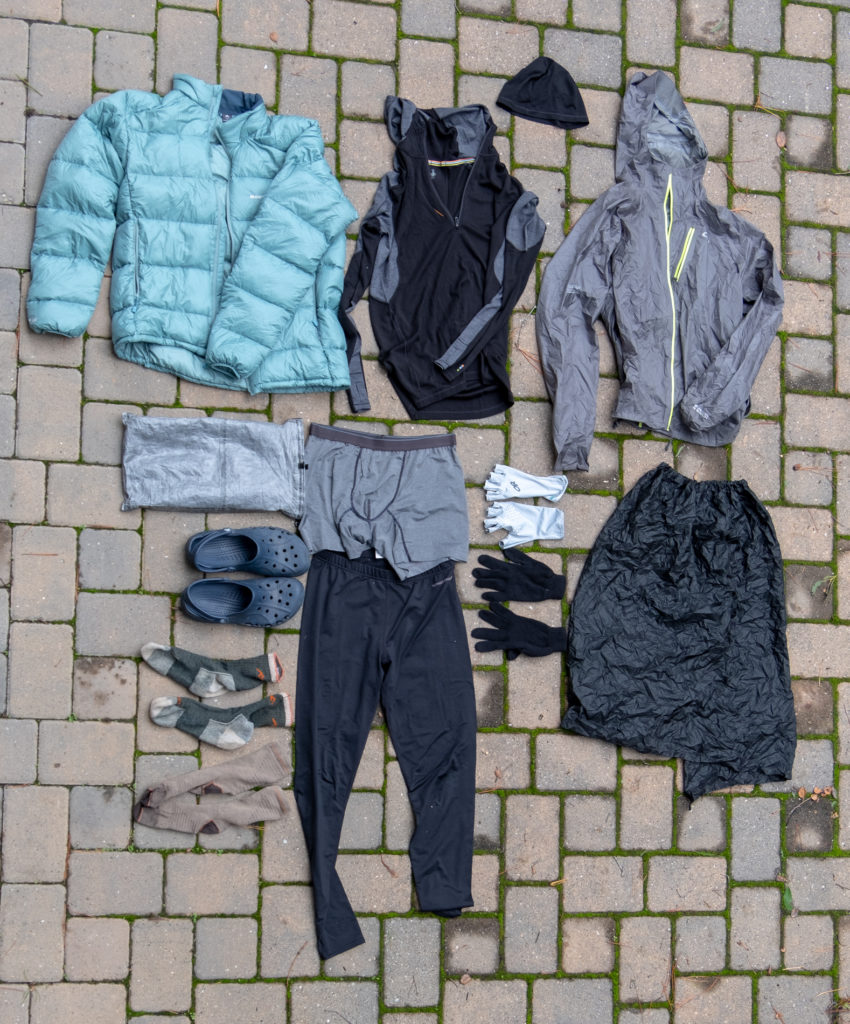
Inside the pack I have a number of sections: Cold weather clothing/sleeping plus trail extras, a section for sleeping bag, tent, wet weather, water, sitting comfort, camera, electronic gadgets, toiletries, common gear and etc.
No item is exempt from re-evaluation for usefulness and weight. One of the hardest decisions was to give up bringing my full frame camera for a pocket camera then deciding a pocket camera was not water resistant and too slow to get to work, so to a mid-size camera. When I re-do this list, things will have changed! THAT’s why each year gets a new list!
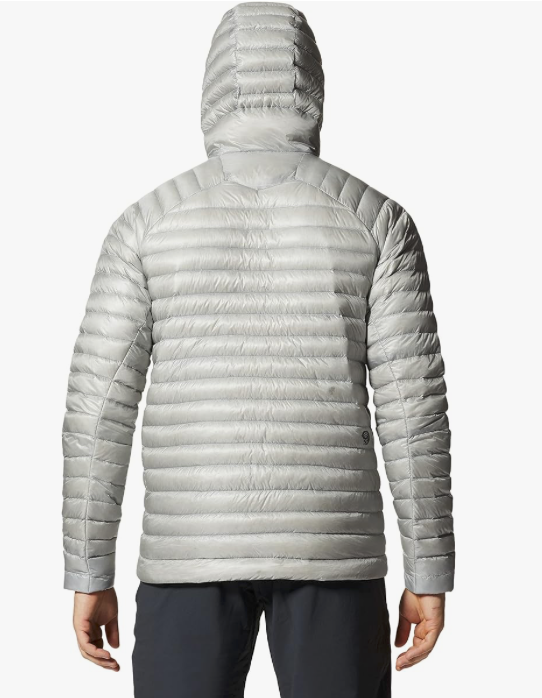
I bring a down (fluffy) coat as the go-to to keep warm in the evenings. I store it in its own waterproof stuff sack. It ends up being one of the last pieces of gear to go into the pack when we leave in the morning as it’s one of the last things to come off when we get ready to hike. I just upgraded to a Mountain Hardware Men’s Ghost Whisperer/2 Hoody. I really like the hood and I think it’s warmer than the prior one. I do use it in the sleeping bag at night to surround my feet to keep them warmer.
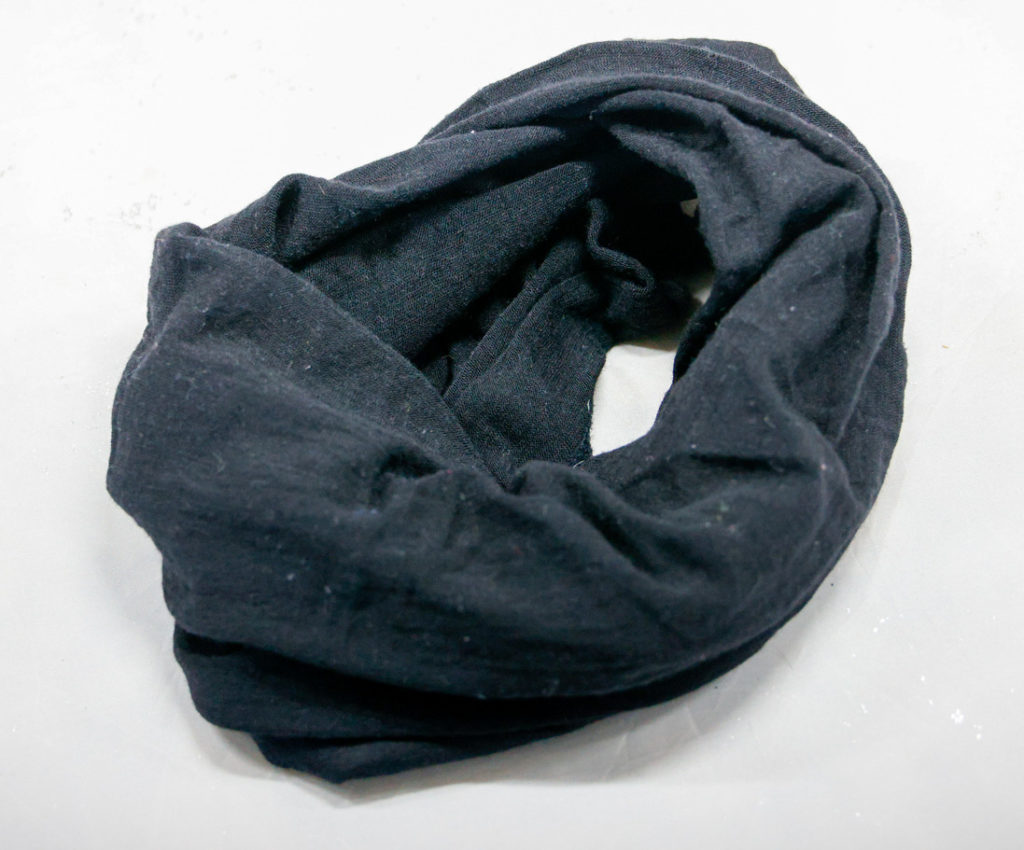
Buff – a tube of soft Marino Wool (thank you New Zealand sheep!!) that can really help keep you warm. I’ve had mine a long time, but I think I got it at REI and they have a “Buff Merino Move Multifunctional Neckwear” that looks similar enough. This is a MUST HAVE.
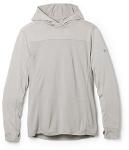
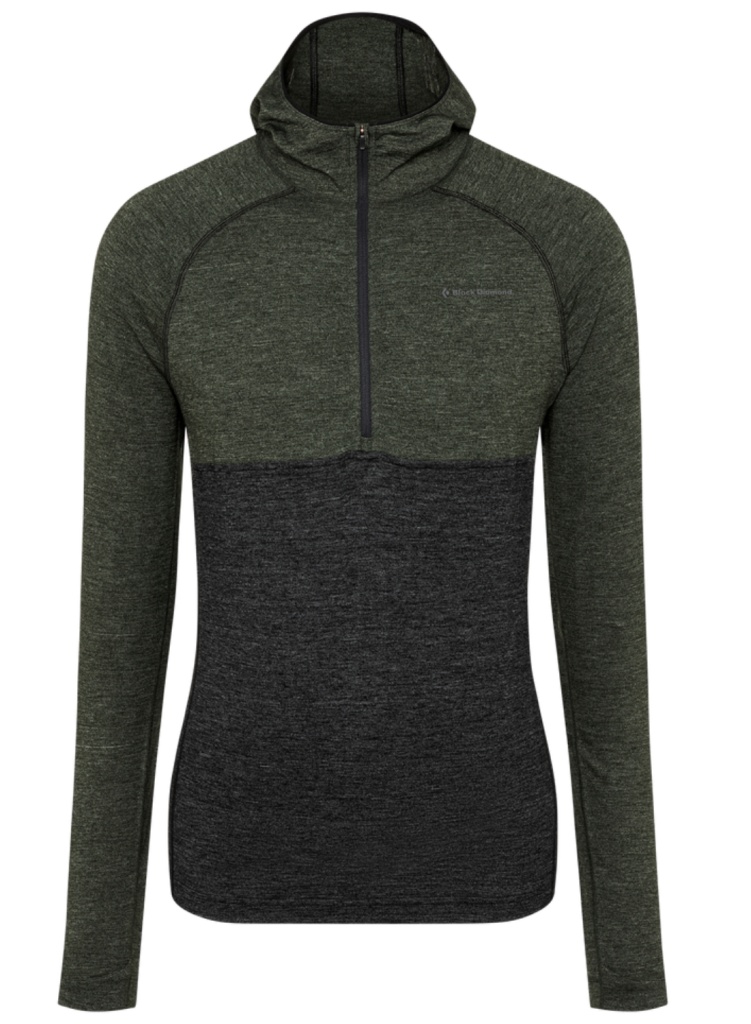
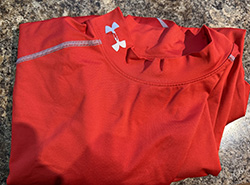
I bring a hooded base layer of soft Marino Wool. This is my after hike shirt (especially when I’m washing/drying my hiking shirt) and also I sleep in it. The hood is great for even more head warmth. The key is the hood, partial zip. I got mine at REI a while ago and I didn’t see the same model there now. It may have been Smartwool. I did a quick check at outdoorgearlab.com and they have one expensive one that looks similar. (That’s the picture posted here.)
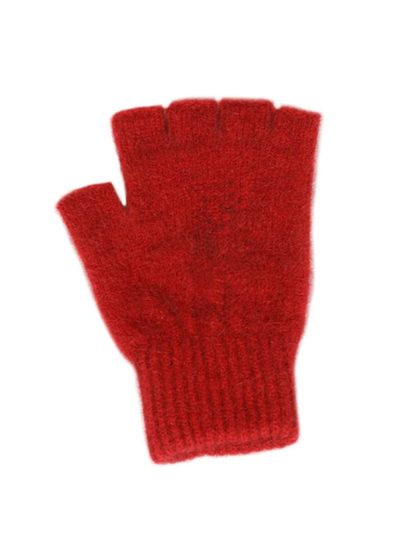
Gloves are an interesting challenge. I always wear hiking / sun gloves on the trail, but in camp I want to have an option to stay warm (and on the trail when it’s snowing or really cold). I stumbled upon “Possum” gloves and ordered a pair (I think on Zpacks site) – they were great, but they were a pain to use my phone. They also wear out FAST. So my new solution are fingerless Possum/Marino hybrid gloves! I got my pair when I was visiting New Zealand (they are in many shops there). So far, I love ’em! But alone they are not enough. I also have waterproof covers (but those are in the wet section of this blog).
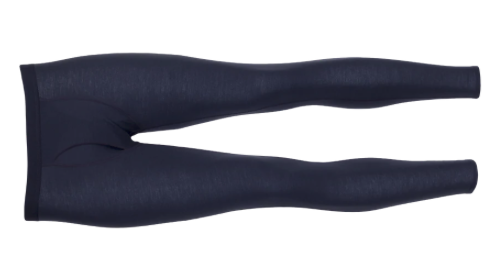
Long underwear are my sleeping outfit for most nights. I don’t like my sunscreen legs to touch in the sleeping bag, so these act as a protective cover. I have two pairs and I pick the one appropriate for the trip – one is lighter weight the other is a pair of “Hot Chillys” long underwear and is a bit heavier.
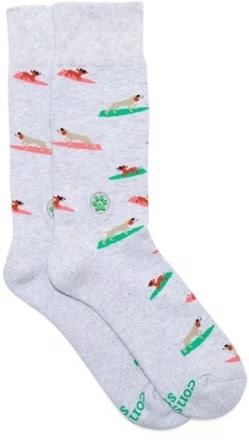
I bring one pair of camp socks – basically a thin / lightweight pair of socks for in camp (to protect against mosquitos) and for sleeping (if needed). They need to be somewhat durable, but not like hiking socks. Style is everything here 😉
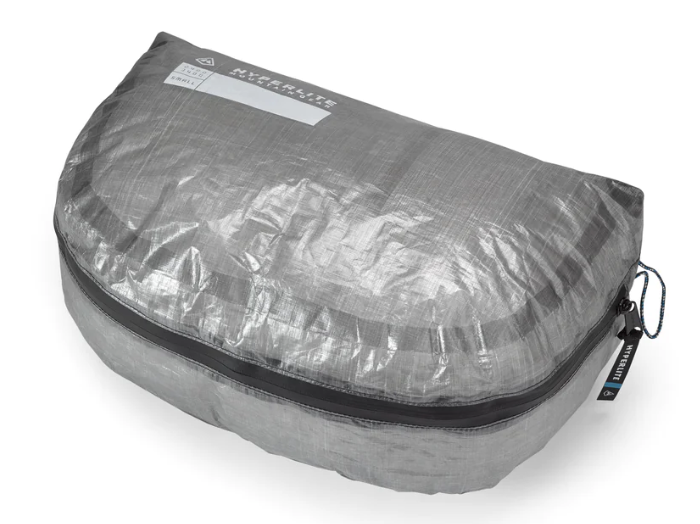
Hyperlight water resistant pod. I put all my clothing (and a few other things) into this new-this-year pod. It’s got a zipper and is about the size of the interior of the backpack – so it just fits in. I don’t trust the waterproof-ness of ANYTHING, so this is an added protection when I may be getting wet. I need a bag anyway, why not a good one with zipper so I can find things? https://www.hyperlitemountaingear.com/products/pods
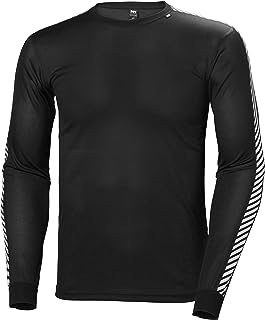
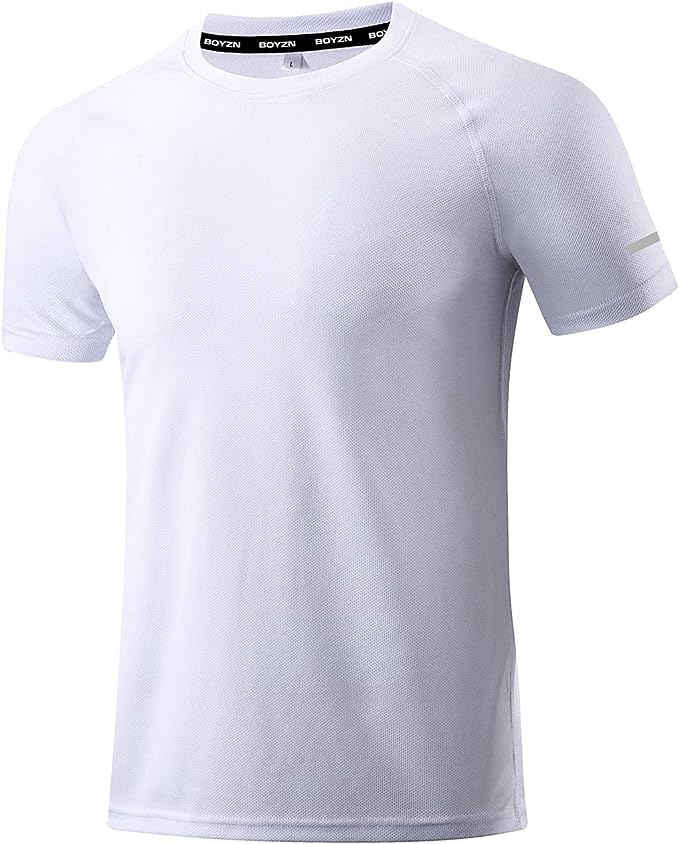
Optional: T-Shirt or a Long Sleeve warm shirt. This all depends on weather predictions. If it’s going to be above 40 degrees, I don’t bring the long sleeve. If it looks like it’s going to be hot I might bring the very lightweight/fast dry T-Shirt as something to wear in camp after hiking. I think the brand Helly-Hansen has been my go-to for the warm one. A think the thin T-Shirt is one I use rowing. VERY lightweight and quick dry.
| Clothing in Backpack | Grams | Pounds | Ounces | ||
| Buff | 1 | 42 | 0.09 | 1.5 | 0.09 |
| Base Hoodie (smartwool) | 1 | 280 | 0.62 | 9.9 | 0.62 |
| Possum Gloves | 1 | 31 | 0.07 | 1.1 | 0.07 |
| Wool Hat | 1 | 58 | 0.13 | 2 | 0.13 |
| Long underware | 1 | 200 | 0.44 | 7.1 | 0.44 |
| Camp socks | 1 | 51 | 0.11 | 1.8 | 0.11 |
| Undies (1) | 1 | 70 | 0.15 | 2.5 | 0.15 |
| Hiking socks (2) | 1 | 148 | 0.33 | 5.2 | 0.33 |
| Hyperlight Pod | 1 | 37 | 0.08 | 1.3 | 0.08 |
| Total: | 917 | 2.02 | 32.4 | 2.02 |
In-camp warmth
you are generally warm when hiking
8 days on trail.
It’s a heavy load at over 3 pounds of clothing! Everything is considered. I only bring two pair of undies for 8 days! They are thin and fast dry – so they get washed often. Socks are swapped at each lunch and one pair is washed daily. Everything to avoid getting blisters. Note no swim suit. It’s undies or nothing to swim. And once in a while you do find hot springs, otherwise it’s very cold alpine lakes. Most of the clothes are for in-camp warmth.
Rain Gear
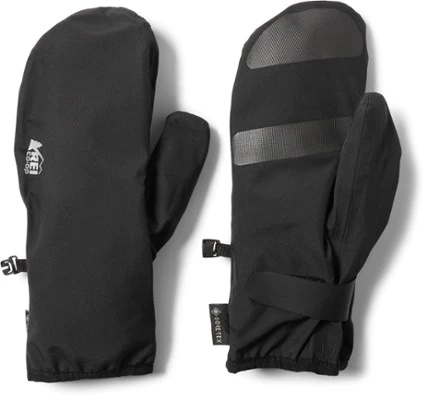
Rain gear AKA wet weather gear serves two purposes: protection against rain and also against wind/cold weather. The poncho serves as the first and easiest way to increase warmth when hiking. Especially at a pass when the wind is blowing. I use the mittens (rarely), but when it’s really cold and/or rain/snow the are needed to keep my fingers warm. The rain kilt is great for light rain, but if it’s multiple days the rain pants offer better warmth.
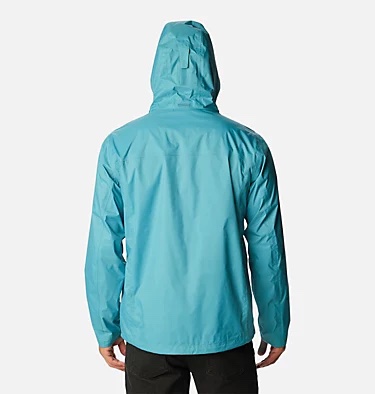
My old standard was the OR Helium rain jacket, but I find it is not thick enough to really help in the wind, so I have gone up one layer to a Mountain Hardware Stretch Ozonic Jacket. So far, so good.
For hand protection the REI Mittens are great! Water proof and give room for my Merino/Possum gloves and finger to warm up in the cold. I think they are https://www.rei.com/product/194829/rei-co-op-minimalist-gtx-mittens-20
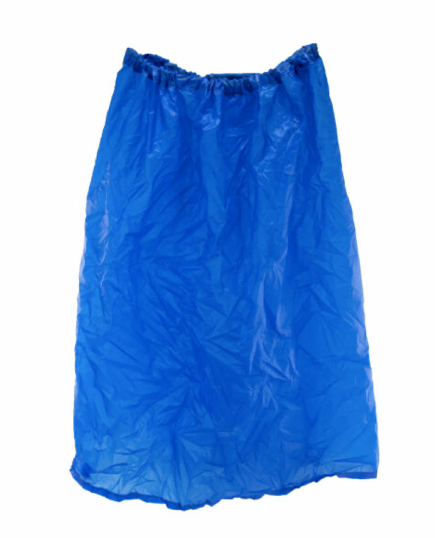
To protect my legs I think a rain kilt is a great lightweight solution. Not as much protection as a pair of pants, but for most showers it’s fine. AND it’s not a pain to put on over boots. It’s also super light. If I expect serious rain I’ll bring both a kilt and pants. https://www.ula-equipment.com/product/rain-kilt/
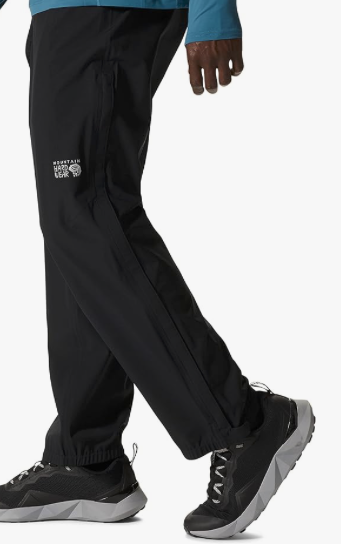
If conditions look like it will have more rain, I’ll upgrade to a pair of rain pants. I just got a pair of Mountain Hardware Men’s Stretch Ozonic Pants. I love the high zippers to make it easy to get on/off when wearing boots. Nice feel as well.
Note that I don’t have a pack cover here. That’s so last year. We did a hike in Corsica earlier this year and we were under a HEAVY rain for hours and my water proof pack cover just didn’t cut it! Ended up wet inside the pack. (I was OK since all important items were in waterproof bags/stuff sacks.) I made a move to a more water-resistant pack and I don’t need a waterproof pack cover anymore.
| Wet weather gear | Bring | Grams | Pounds | Ounces | |
| Glove Covers | 1 | 50 | 0.11 | 1.8 | 0.11 |
| Waterproof Shell – Mt Hardware | 1 | 295 | 0.65 | 10.4 | 0.65 |
| Waterproof Kilt | 0 | 80 | 0.18 | 2.8 | 0 |
| Rain Pants Mt. Hardware | 1 | 275 | 0.61 | 9.7 | 0.61 |
| Rain Gear Total | 650 | 1.43 | 23 | 1.37 |
Hardware
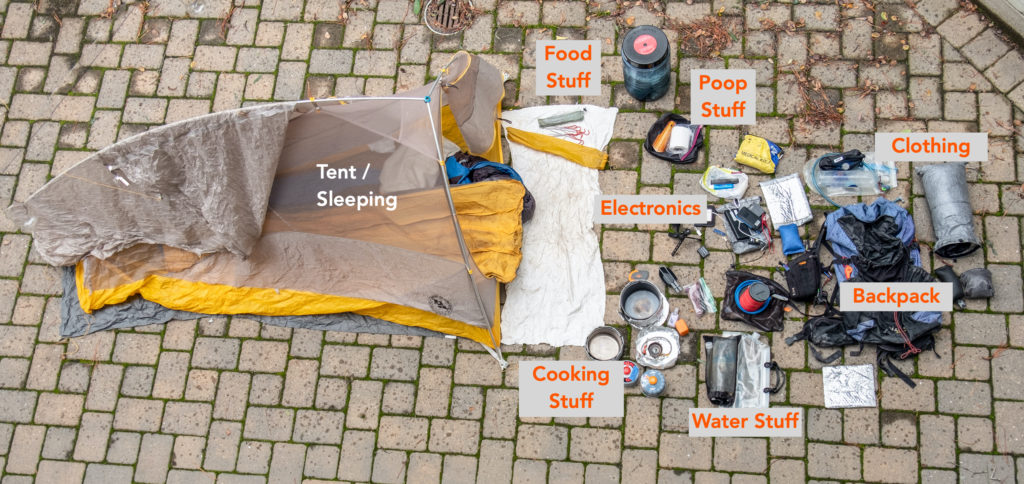
Now comes the hardware needed to be in camp and on the trail. All is stuffed into the backpack.
The Pack
The choice of a pack is one of the first and hardest for backpackers. There are two basic approaches: Lots of pockets or almost no pockets. I’m of the no pocket group. My pack is a great big deep bag with almost nothing inside it. I really like to have a bear canister sit horizontally so it really restricts the number of packs that meet my criteria. Earlier this year my go-to pack, the ULA Catalyst finally got a big rip in the fabric, so I did the search for a new one. I ended up with the … ULA Catalyst Ultra. The exact same pack, but with a water resistant fabric (https://www.ula-equipment.com/product/ultra-catalyst/)
Strong / big enough to hold 40 pounds – Comfortable to carry for 20 miles – Easy to pack AND FIND THINGS
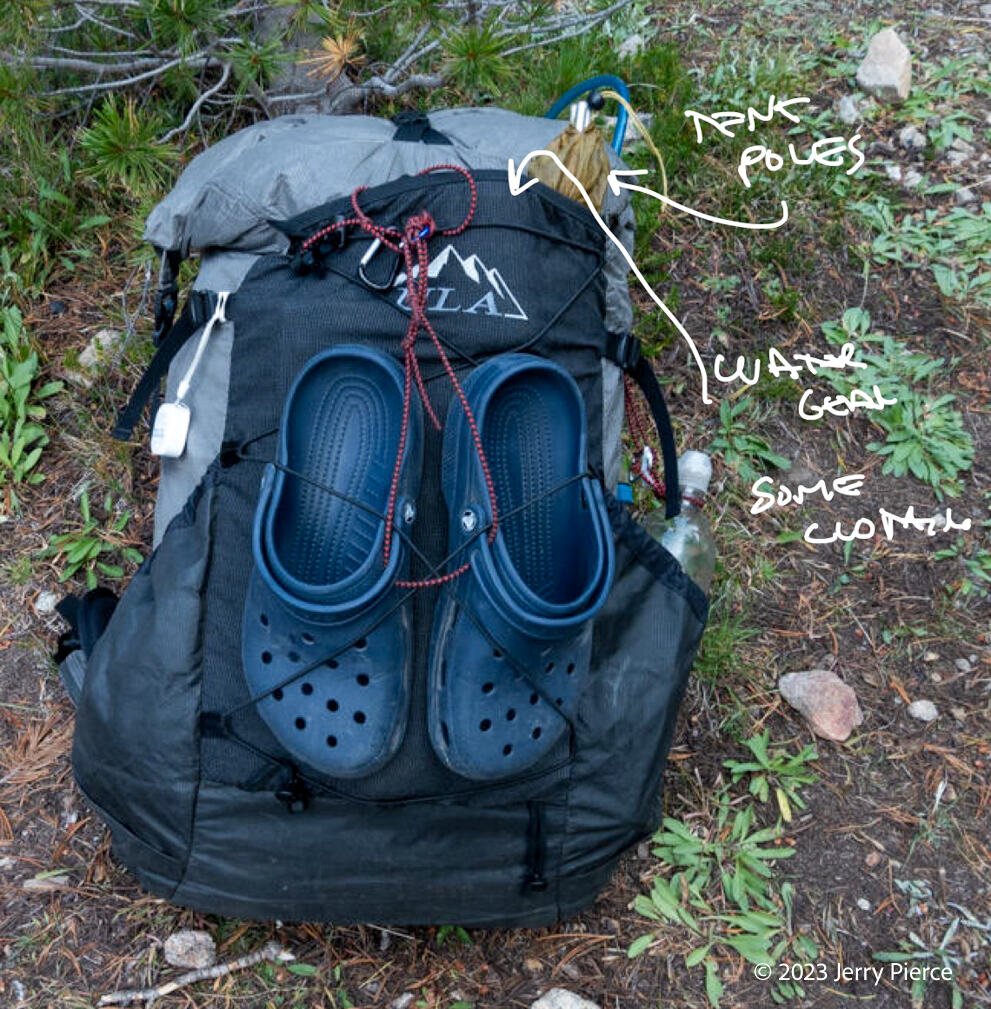
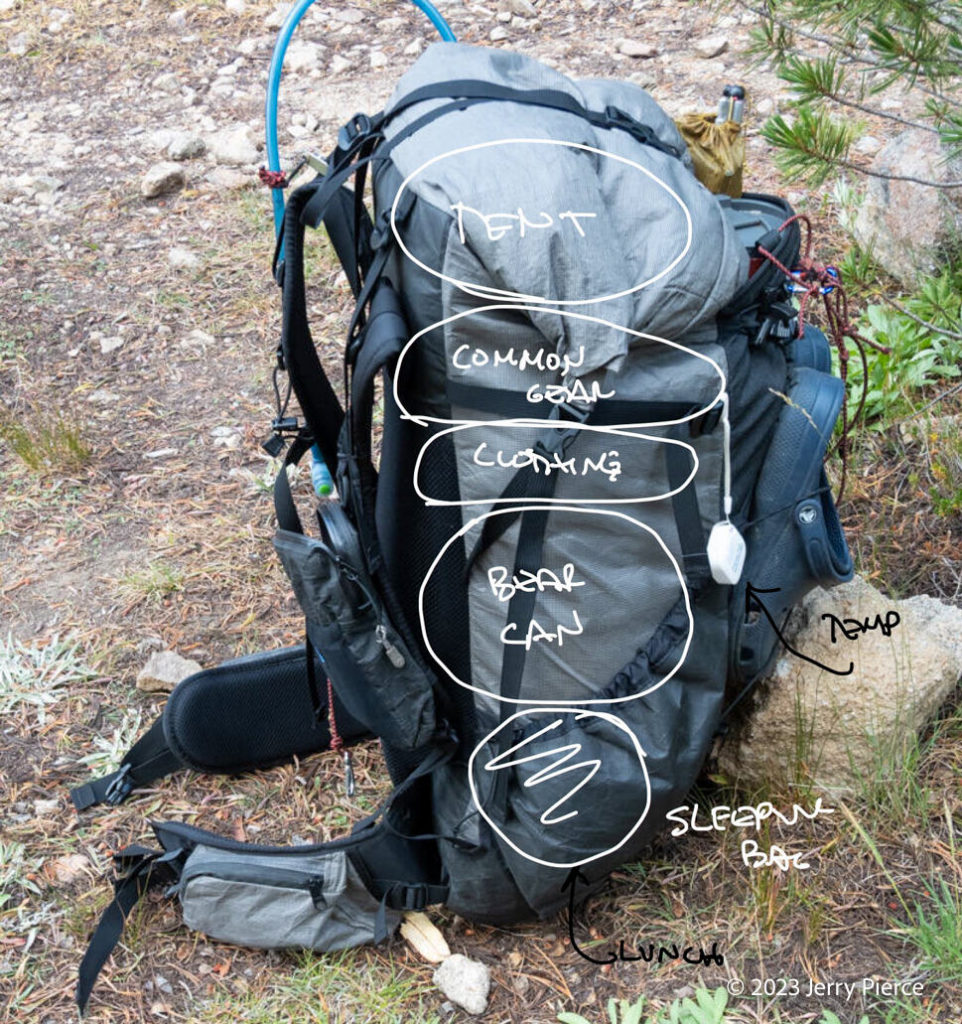
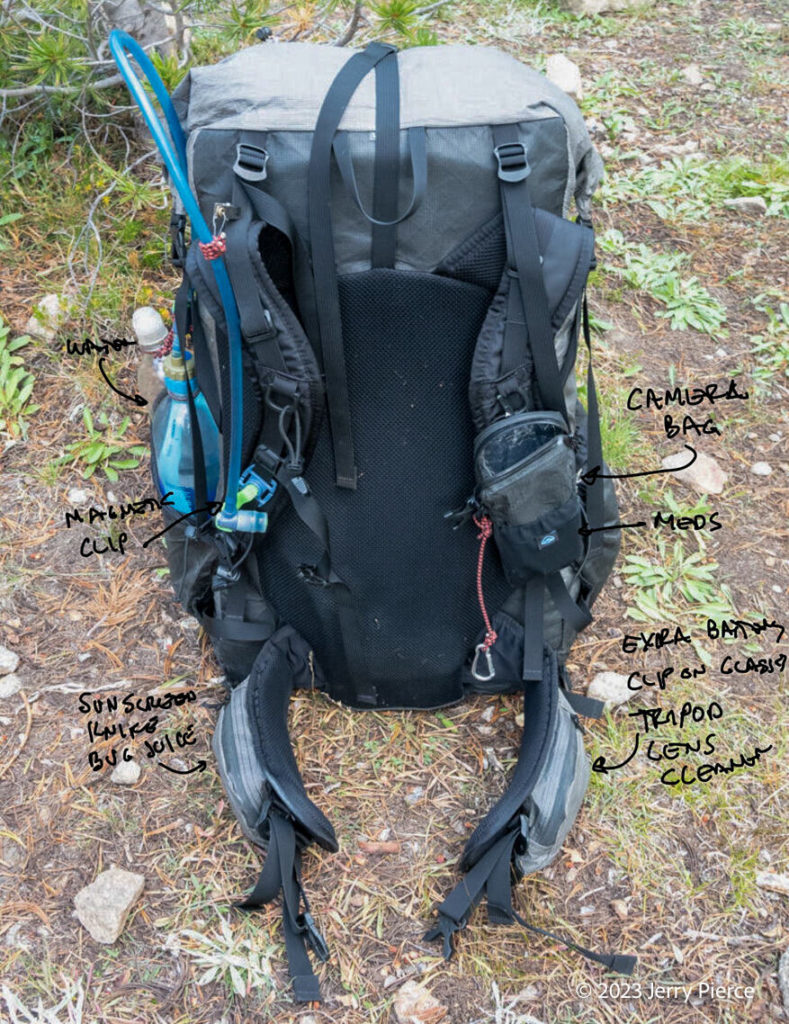
It’s taken a while to figure out how to stuff everything in the backpack so the load is even and not lopsided. I have the camera case on the front so it’s easy to grab the camera and quickly take a picture. The water filter is inside my coffee cup in the back pocket for easy access. I keep my satellite communicator with my camera – the camera bag is too big for my camera so the satellite fills up the space and keeps it close.
It’s designed to unpack and set up camp quickly. The last thing I need when setting up camp is the sleeping bag, so it’s at the bottom – stuffed in a waterproof bag. Total weight of the backpack with all the pockets and camera case is 3.8 pounds.
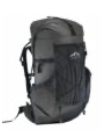
ULA’s backpack normally has a distinctive pattern, but the Ultra does not. Other than it’s a really good and comfortable backpack, its main claim to fame is that a bear canister can fit horizontally in the bag – for me this is a big win! Much better for keeping the weight balanced. https://www.ula-equipment.com/product/ultra-catalyst/
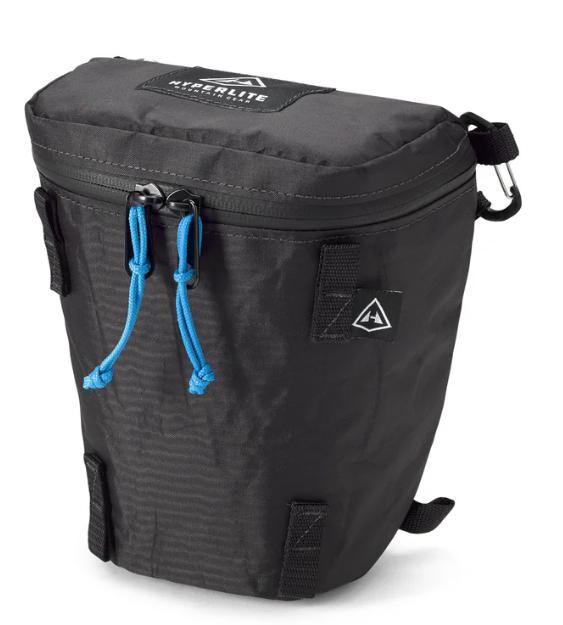
With a new camera, I have gone back to the Hyperlight Camera Pod https://www.hyperlitemountaingear.com/products/camera-pod?variant=39459748479021 It’s too big for my camera, but I stuff the bottom with the satellite receiver.
| Backpack | Bring | Grams | Pounds | Ounces | |
| ULA Ultra Catalyst Backpack | 1 | 1,381.00 | 3.05 | 48.8 | 3.05 |
| Camera Pod by Hyperlite Mountain Gear – Regular | 1 | 79 | 0.17 | 2.8 | 0.17 |
| Backpack Total | 1,460 | 3.22 | 51.6 | 3.22 |
Tent
Lightweight / 3-season / waterproof / good against the wind
I now use a hiking pole supported ultra thin/light tent – the Durston X-Mid Pro 1. It has amazing space in the vestibules for my pack and boots. It’s big enough to comfortably have both the sleeping bag and my electronics. This particular design has doors on both sides and the support trekking poles are NOT in the doorway for easy entrance/exit. And of course it’s really light weight.
I bring a partial footprint. It includes under the bathtub and an entrance mat so I help prevent bringing in too much dirt/mud into the tent. I made it out of Tyvek kite material.
I use my daypack to store the tent in my backpack.
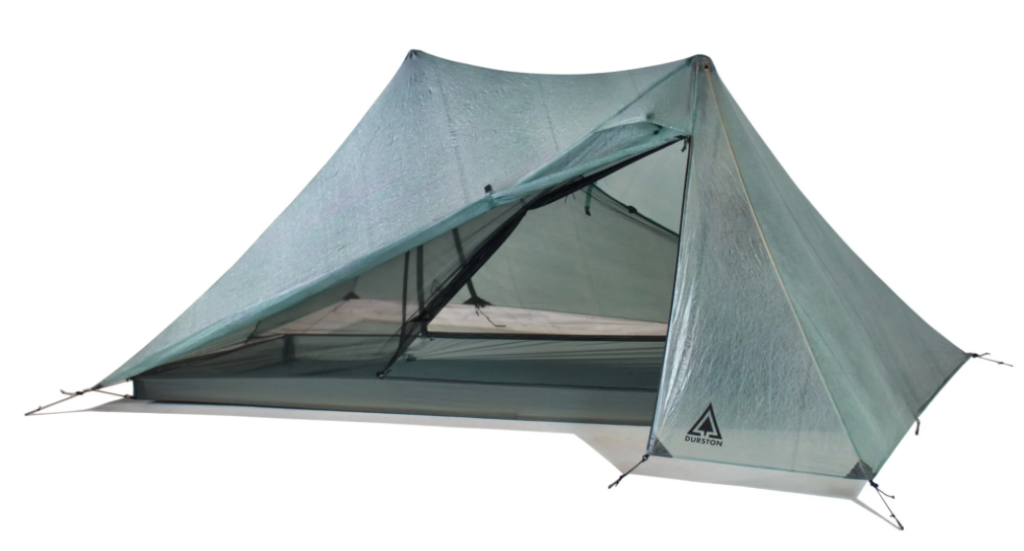
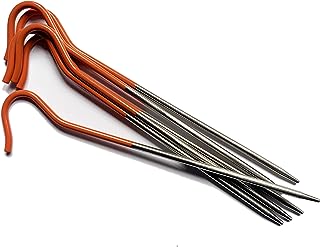
I do want to point out my favorite type of tent stake – titanium Shepards hook style. I think they find a place in more varieties of ground than the triangle version that comes with the tent. This is changing. I found that these are good for most Sierra ground, but if it’s hard packed the triangle ones work better. I will probably upgrade to bring a few of each. (Not much difference in weight.)
| Tent | Bring | Grams | Pounds | Ounces | |
| Tent Body (insect proof and waterproof floor) Durston | 1 | 445 | 0.98 | 15.7 | 0.98 |
| Tent Stakes and guy lines | 1 | 126 | 0.28 | 4.5 | 0.28 |
| Under tent + Entrance mat | 1 | 139 | 0.31 | 4.9 | 0.31 |
| Day bag | 1 | 76 | 0.17 | 2.7 | 0.17 |
| Tent Stuff Total | 786 | 1.7 | 27.8 | 1.74 | |
| Entrance Mat only | 0 | 66 | 0.15 | 2.3 | 0 |
Sleeping Bag and Air Mattress
Insulated Air Mattress (LIFESAVER!!)
Air Mattress is PART of sleeping bag – can’t roll off! No insulation on bottom of sleeping bag.
Current generation is good enough to sleep on side
Down jacket stuffed to feet for
added warmth
Good to 20°F (-7°C) – can add liner if going colder
Waterproof stuff sack — In case of rain /wet backpack
The biggest change in hiking from the time I was a boy scout is the comfort of an air mattress. These are 3-4 inches thick and provide warmth with a R-Value rating of about 3.3 – they have down feathers inside. It is stuffed into a sleeve in the sleeping bag so the sleeping bag has no insulation on the bottom to reduce the weight. I like a wide foot area ‘cause I do a lot of rolling when I sleep. This is good to about 20° F and weighs about 4 pounds for both. If I’m going to a cold place, I can bring a sleeping bag liner and thicker long-johns. I now bring a down pillow with me. It’s very lightweight and it makes things so much more comfortable.
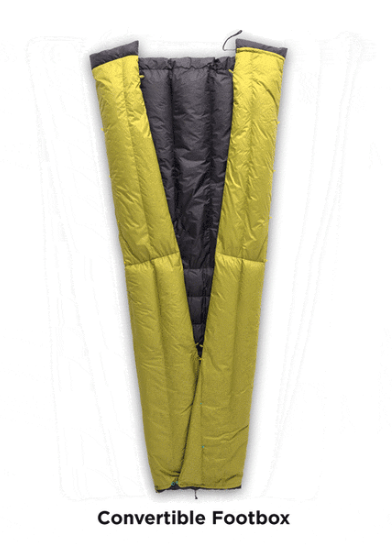
A big change this year is the switch to a sleeping quilt (with Light Sheet).
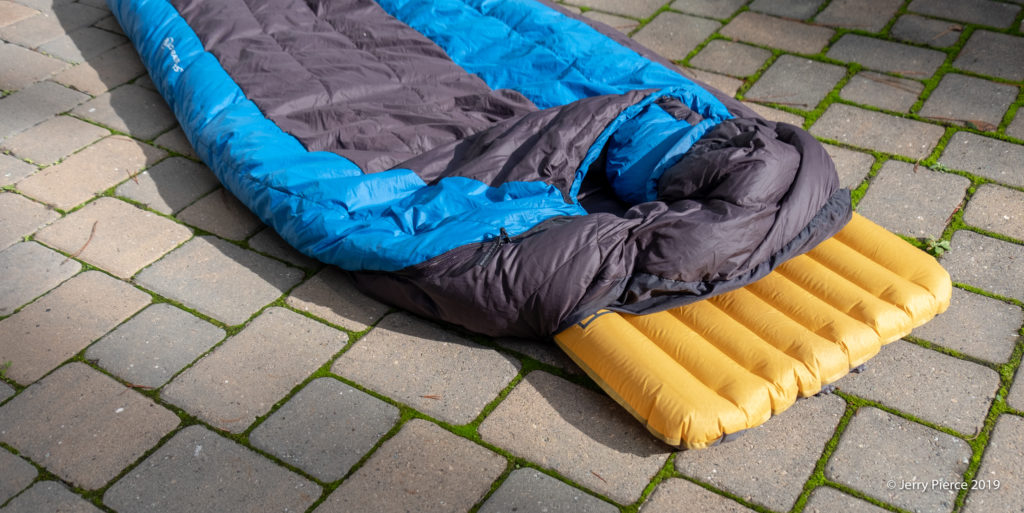
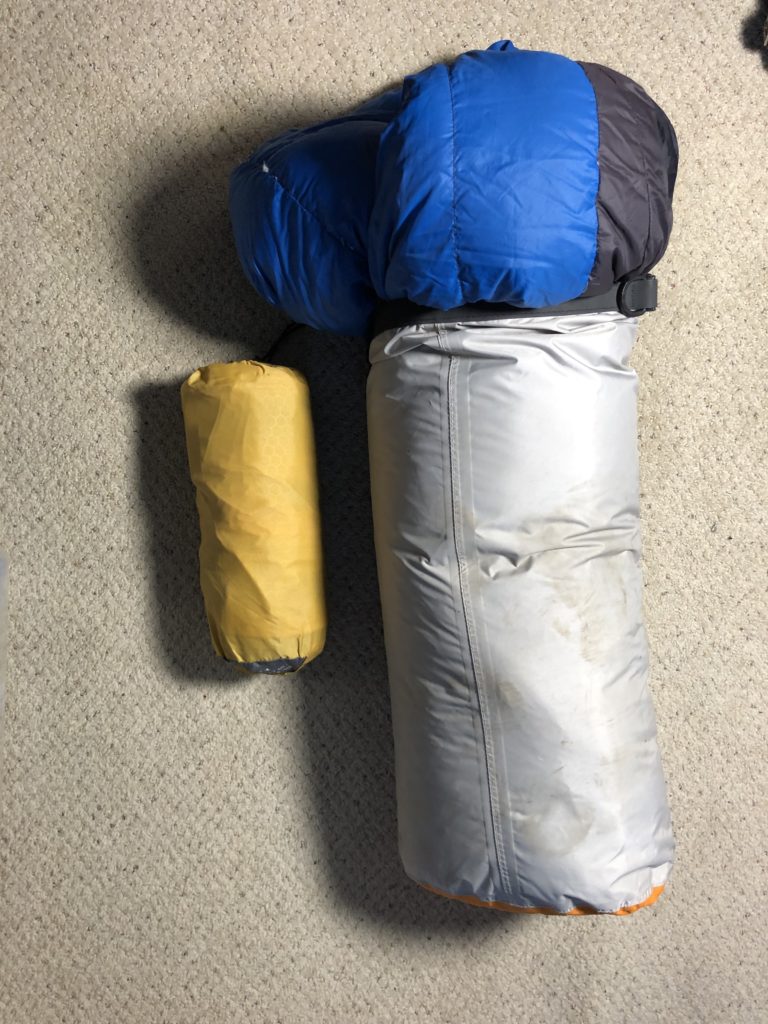
My sleeping bag is a Zenbivy Light Quilt 10° https://zenbivy.com/collections/light-quilts/products/zenbivy-light-quilt-10
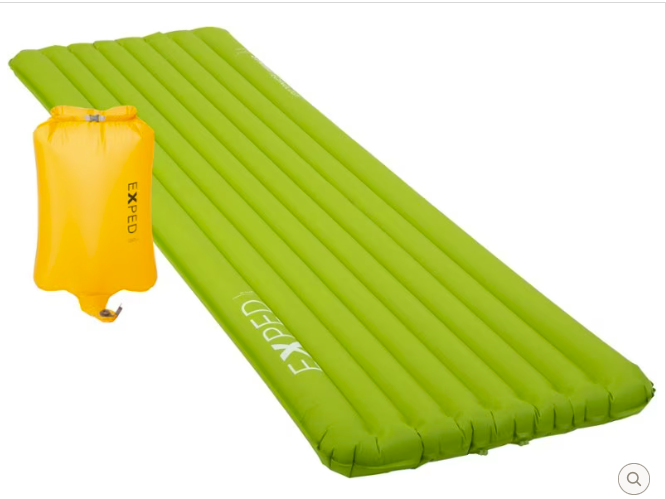
EXPED air mattress – I really like it! I had a problem with one a few years ago and EXPED made good on it. Always a bonus in my book. https://www.rei.com/product/201644/exped-ultra-3r-sleeping-pad
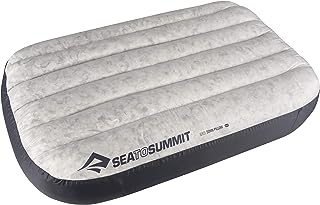
In the past I would just use one of my stuff sacks and fill it with some random clothing for a pillow, but then I found these very lightweight and down filled air pillows. I’m sold! Much more comfortable! Pillow – https://www.amazon.com/gp/product/B07NSCQ4M9/

I use the ZenBivy 15l dry sack to stuff the sleeping bag, air mattress and pillow. It has a one-way valve to release air and it’s perfect for getting it to the right shape to fit in the bottom of the bag. It goes in first, comes out last. Perfect!
| Sleeping Bag Stuff | Grams | Pounds | Ounces | ||
| Zenbivy Sleeping Quilt | 1 | 950 | 2.1 | 33.6 | 2.1 |
| Sheet | 1 | 287 | 0.63 | 10.1 | 0.63 |
| Stuff Sack | 1 | 36 | 0.08 | 1.3 | 0.08 |
| Pillow | 1 | 69 | 0.15 | 2.4 | 0.15 |
| Air mattress | 1 | 502 | 1.11 | 17.7 | 1.11 |
| Sleeping Bag Total | 1,844 | 4.07 | 65.1 | 4.07 |
Water in the Wilderness
Water on the trail extremely important
4 miles/liter (Your mileage may vary)
Water HEAVY (2.2 pounds/liter)
Plan each day to see where water on trail – plan on filtering during hike
Water is by far the most important item that you need and it’s the Heavy. I get about 4 miles to the liter when hiking and I use another liter at lunch and 1-2 liters in the evening. We use filters to clean up the water these days – gone are the chemicals and UV light sources that have been popular over the years. Things have changed! I have moved to smart water bottles only with an adapter for a tube. I’ve moved to a Katadyn BeFree water filter. We look at the day’s hiking to see where we can get water on the trail and only bring enough water to make it to the crossing and get more water.
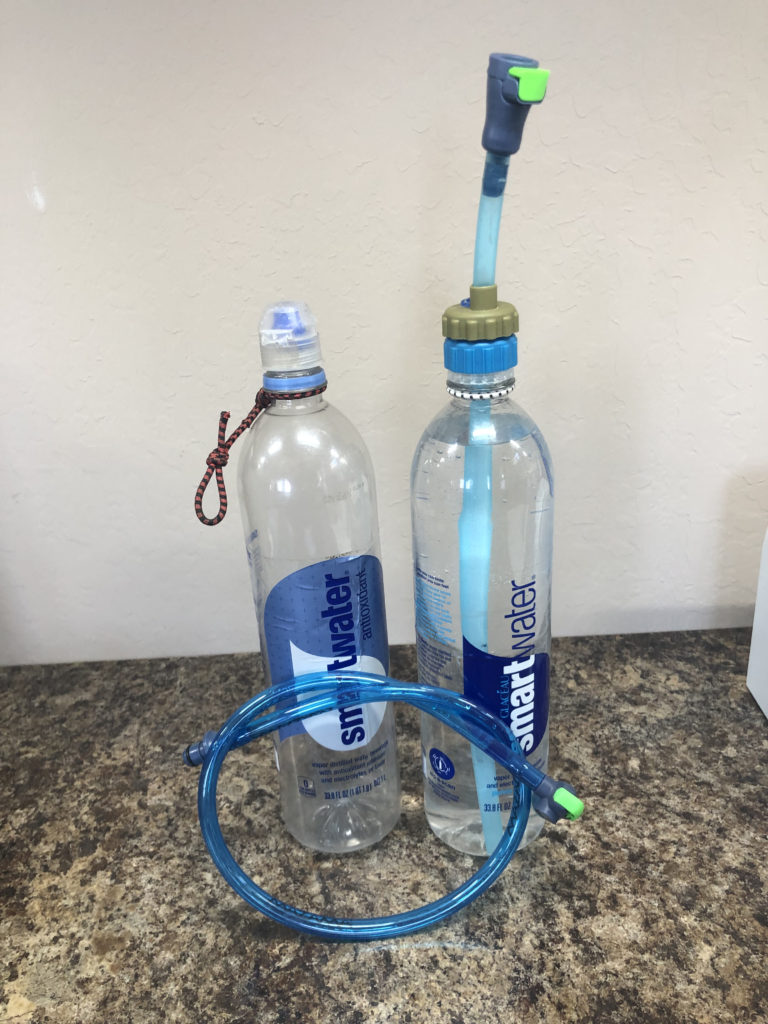

Smart Water Bottles (2). These are 1liter normal water bottles that you get filled with … water. They are the right size for hiking and are durable – good for one season of hiking. I tie a loop on the top of the bottle so I can hook it up to the backpack so it doesn’t escape when hiking.
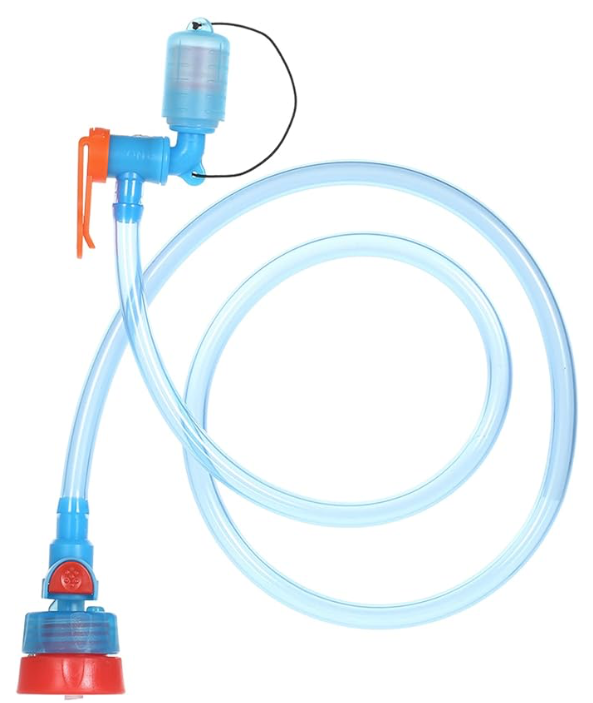
Tube adapter turns a water bottle into a reservoir for on-trail drinking. It’s the best of both world (IMHO) for water delivery. I don’t like the hassle of an internal bladder system. I have made a few modifications on mine. First I make sure there is a disconnect between the bottle and the tube so I can easily remove and refill the bottle. Second the bite valve has a magnetic clasp to hold it on the backpack strap and third I added a clip with a slider to keep it in place and at the correct length. I use the same tube for day hikes and this makes it easier to shift. Try searching for “smart water hydration tube” in Amazon. They also have one in GarageGrownGear.com, but I like a quick release at the bottle. Try Amazon Possibility. But Look carefully.

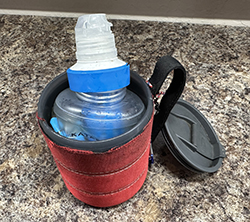
The Katadyn BeFree water filter seems to be the easiest to use and is fast (at least for the first 20 days of use – after that it slows down and needs more pressure to get the liter filtered.) Get the 1 liter version – I had the 0.6 liter version and it was OK, but not as convenient as the liter size. On trail, I keep it stuffed into my coffee cup with lid and it’s stored at the top of the outside pocket on my backpack for easy access. I tie a leash on the cup just to make sure it doesn’t escape. Some hikers think the plastic bag is too delicate, but we have found it to be OK.

In the world of belt and suspenders, I also bring a few chemical tabs just in case. I haven’t used them in years, but in case of a filter failure this is the backup. I include them in the medical pack.
| Water Gear | Grams | Pounds | Ounces | ||
| Katakyn Water Filter | 1 | 75 | 0.17 | 2.6 | 0.17 |
| Smart Bottle plus tube | 1 | 209 | 0.46 | 7.4 | 0.46 |
| Total Water Gear: | 284 | 0.63 | 10 | 0.63 | |
| FYI 1 liters of water | 0 | 1000 | 2.21 | 35.3 | 0 |
Taking Care of Business
Dig Cat-hole
6” deep IN ROCKS or ROOTS
Squat (aim) and try not to splash
No paper left behind
Used paper in plastic bag
Yes, there really is a book called “How to Shit in the Woods.” Not a bad book really, but doesn’t cover some of the more critical issues like how to avoid splashing. Or, perhaps more importantly, how to handle mosquitos when that soft, unprotected skin is a potential target. You really don’t want a mosquito bite there. Digging a hole seems like an easy thing to do, but in rocky terrain or where there are lots of roots it can be a challenge. Especially when you are in a hurry. Some of my friends dig their cat-hole the prior night so when in a rush, it’s a quicker trip.
No one ever talks about how to dig a cat hole or how to use it. Key for me: should be on a slight slope. Dig as deep as you can – aim for 6″ but honestly it’s really hard to get that deep in LOTS of places we camp. Best near the base of a tree – sometimes digging is easier there. Sometime the gophers leave holes that can be re-used. Sometime under rocks can be used. Squat aiming downhill (so pee goes away from your shoes). Use sticks and rocks to cover the hole after use.

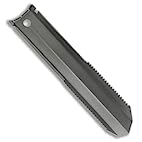
Trowels – who would think it matters? Actually I have tried a few of them and my old favorite was a very solid aluminum scoop. The problem was the top is a sharp edge and it’s hard to push in hard soil/rocks. So I tried a cute one with a plastic edge – worked fine until it broke in rocks – really broke. So I’ve moved to a titanium longer one with a fold at the top. It’s twice the weight of the old one – but I think it’s worth it. Time will tell.
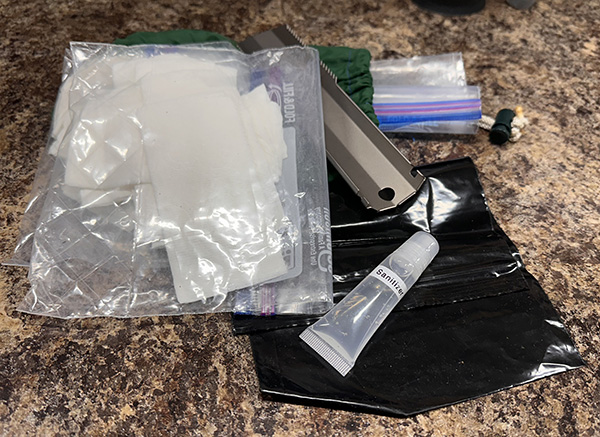
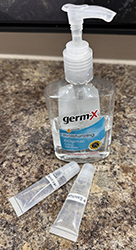
Sanitizer – I bring sanitizer for both my poop bag and my eating utensils. I do my best to get non-smelly sanitizer (I don’t want to attract bears). I bought a batch of little tubes from Amazon and fill them. Light weight and easy to use.
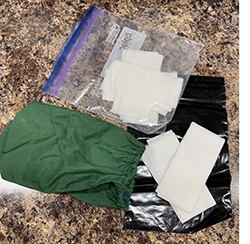
You need to bring a bag to collect your used TP. Clearly this is not something you want to see and/or have it open unexpectedly. I got a lifetime supply from Amazon of black bags that work. https://www.amazon.com/gp/product/B00J8SIFAC/ I bring an extra with me each trip, just in case. It is the first thing that gets tossed when I get back to the trailhead. As far at TP goes I found that the Charmin brand is stronger and I can use double layer without them tearing. I use a minimum of two squares per “squatting” and sometimes go to six squares. (TMI) So I count what I bring and fold them in two plastic bags (in case one gets wet). I bring about 16 squares per day to cover possible diarrhea. (more TMI). And then a carrying bag for all the stuff. I bring an extra plastic bag in case I need to pee inside the tent when it’s raining outside. All needs to be in sealed plastic bags in case it gets wet.
| Poop Gear | Grams | Pounds | Ounces | ||
| Trowel | 1 | 34 | 0.08 | 1.2 | 0.08 |
| Sanitizer | 1 | 15 | 0.03 | 0.5 | 0.03 |
| TP (TP, Waste bag, Extra plastic bags) | 1 | 65 | 0.14 | 2.3 | 0.14 |
| Total Poop Gear: | 114 | 0.25 | 4 | 0.25 |
Personal Food Stuff
Eating: Bowl, Insulated mug, Spoon, Soap, Sponge, bag
Then there are the usual eating containers the all important morning coffee, soups, main course and oatmeal! I have been modifying this category for a while now and it seems to be settling in.
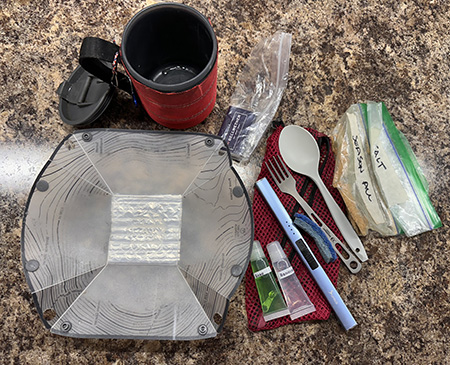
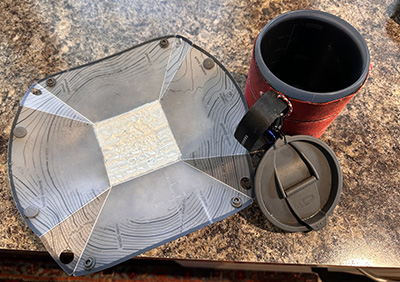
I bring a (heavy) coffee cup/soup cup since I like the insulated measuring cup it provides. It’s a GSI Outdoors mug – I added a leash for the top and a carabiner to attach to the backpack when it’s carrying the water filter. https://www.amazon.com/GSI-Outdoors-Lightweight-Backpacker-Backpacking/dp/B08SB715J4/ I have gone to a foldable bowl for pasta and oatmeal. https://www.amazon.com/gp/product/B07S87W3Y7/ I only use the bowl, but someone suggested bringing the plate for common gear as a cutting board. I needed to glue on an insulated pad since hot foods are too hot to hold without it.
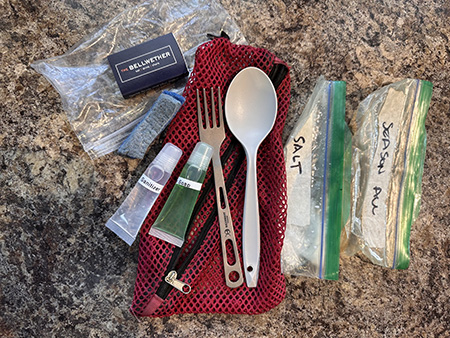
I use a big plastic spoon – I like the size. I bought a set of titanium silverware – but only normally bring the fork – I like my pasta and only a fork will do. (I sometime bring the knife if I have a meal that require cutting cheese. The titanium spoon is too small.) I cut a kitchen sponge and bring a small piece to clean my stuff. I also bring my own soap / sanitizer. Add small packets of salt / season-all spices and a spare set of matches.
| Personal Food Stuff | Grams | Pounds | Ounces | ||
| Mug | 1 | 117 | 0.26 | 4.1 | 0.26 |
| Plate | 1 | 40 | 0.09 | 1.4 | 0.09 |
| Spoon/Fork/Bag/cleaning stuff/spices/matches | 1 | 86 | 0.19 | 3 | 0.19 |
| Total food stuff: | 243 | 0.54 | 8.6 | 0.54 |
Personal Toiletries
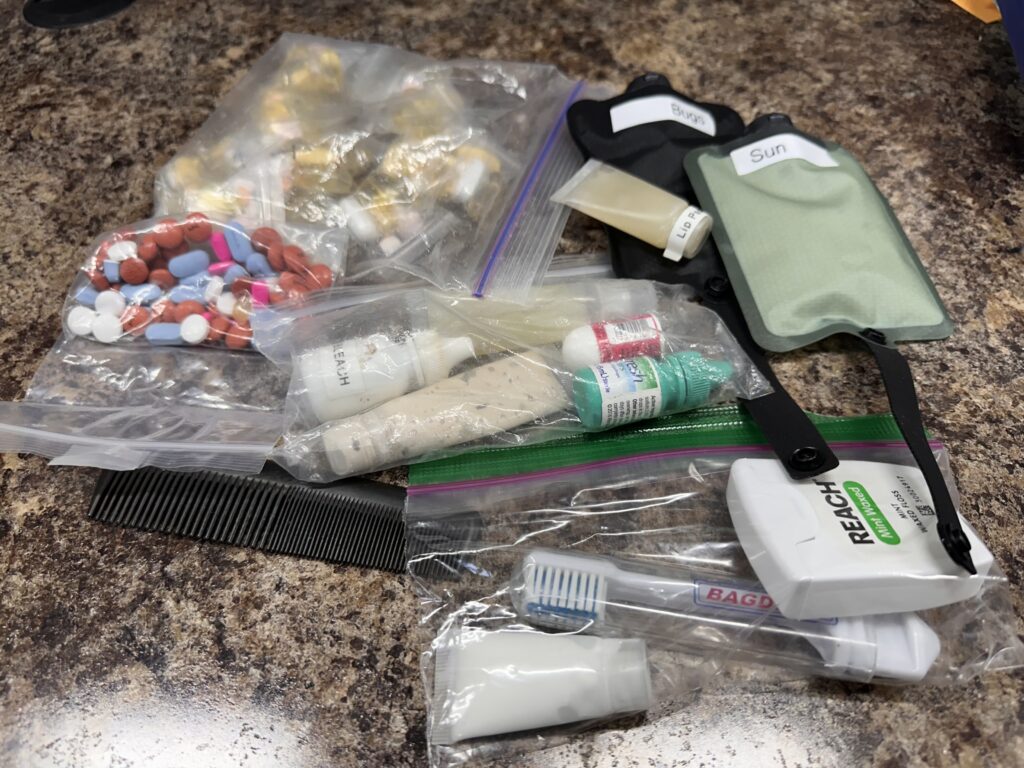
I bring my sunscreen in a little 3 oz flexible container – that’s enough for a 8 day hike. I fill it with about 2 oz of sunscreen. (FWIW I use Neutrogena Ultrasheer 55.) Also a little packet is the insect repellent – Picaridin – I think it’s as good as Deet and not as toxic. I use cover-the-body for most anti-mosquito protection. I use a lip paste (Aquaphor lip protection and sunscreen SPF 30). I like to know how much I have left and the little chapstick containers are a bit too random for me. I bring Vaseline, some eye meds, my vitamins, Advil and AdvilPM, aspirin, a comb. For tooth care I bring a small floss dispenser, easy to use. Toothpaste in a small tube and a comb. I bring a little bleach for doing laundry and helping reduce the smell. I bring a small comb just to “look my best” and/or scratch my head after days of not washing it!
Everything needs to be small since this entire bag needs to go in the bear canister at night.
| Personal Toiletries | Grams | Pounds | Ounces | ||
| Toothbrush, tooth paste, floss | 1 | 26 | 0.06 | 0.9 | 0.06 |
| Sunscreen, Picaridin, Lip | 1 | 94 | 0.21 | 3.3 | 0.21 |
| Meds, Bleach | 1 | 59 | 0.13 | 2.1 | 0.13 |
| Vitamins and will be used | 1 | 130 | 0.29 | 4.6 | 0.29 |
| Advil, salonpas, meds | 1 | 66 | 0.15 | 2.3 | 0.15 |
| Meds and etc. | 1 | 139 | 0.31 | 4.9 | 0.31 |
| In camp glasses, lens cleaner, spare hooks | 1 | 70 | 0.15 | 2.5 | 0.15 |
| Bag and comb | 1 | 22 | 0.05 | 0.8 | 0.05 |
| Total | 606 | 1.34 | 21.4 | 1.34 |
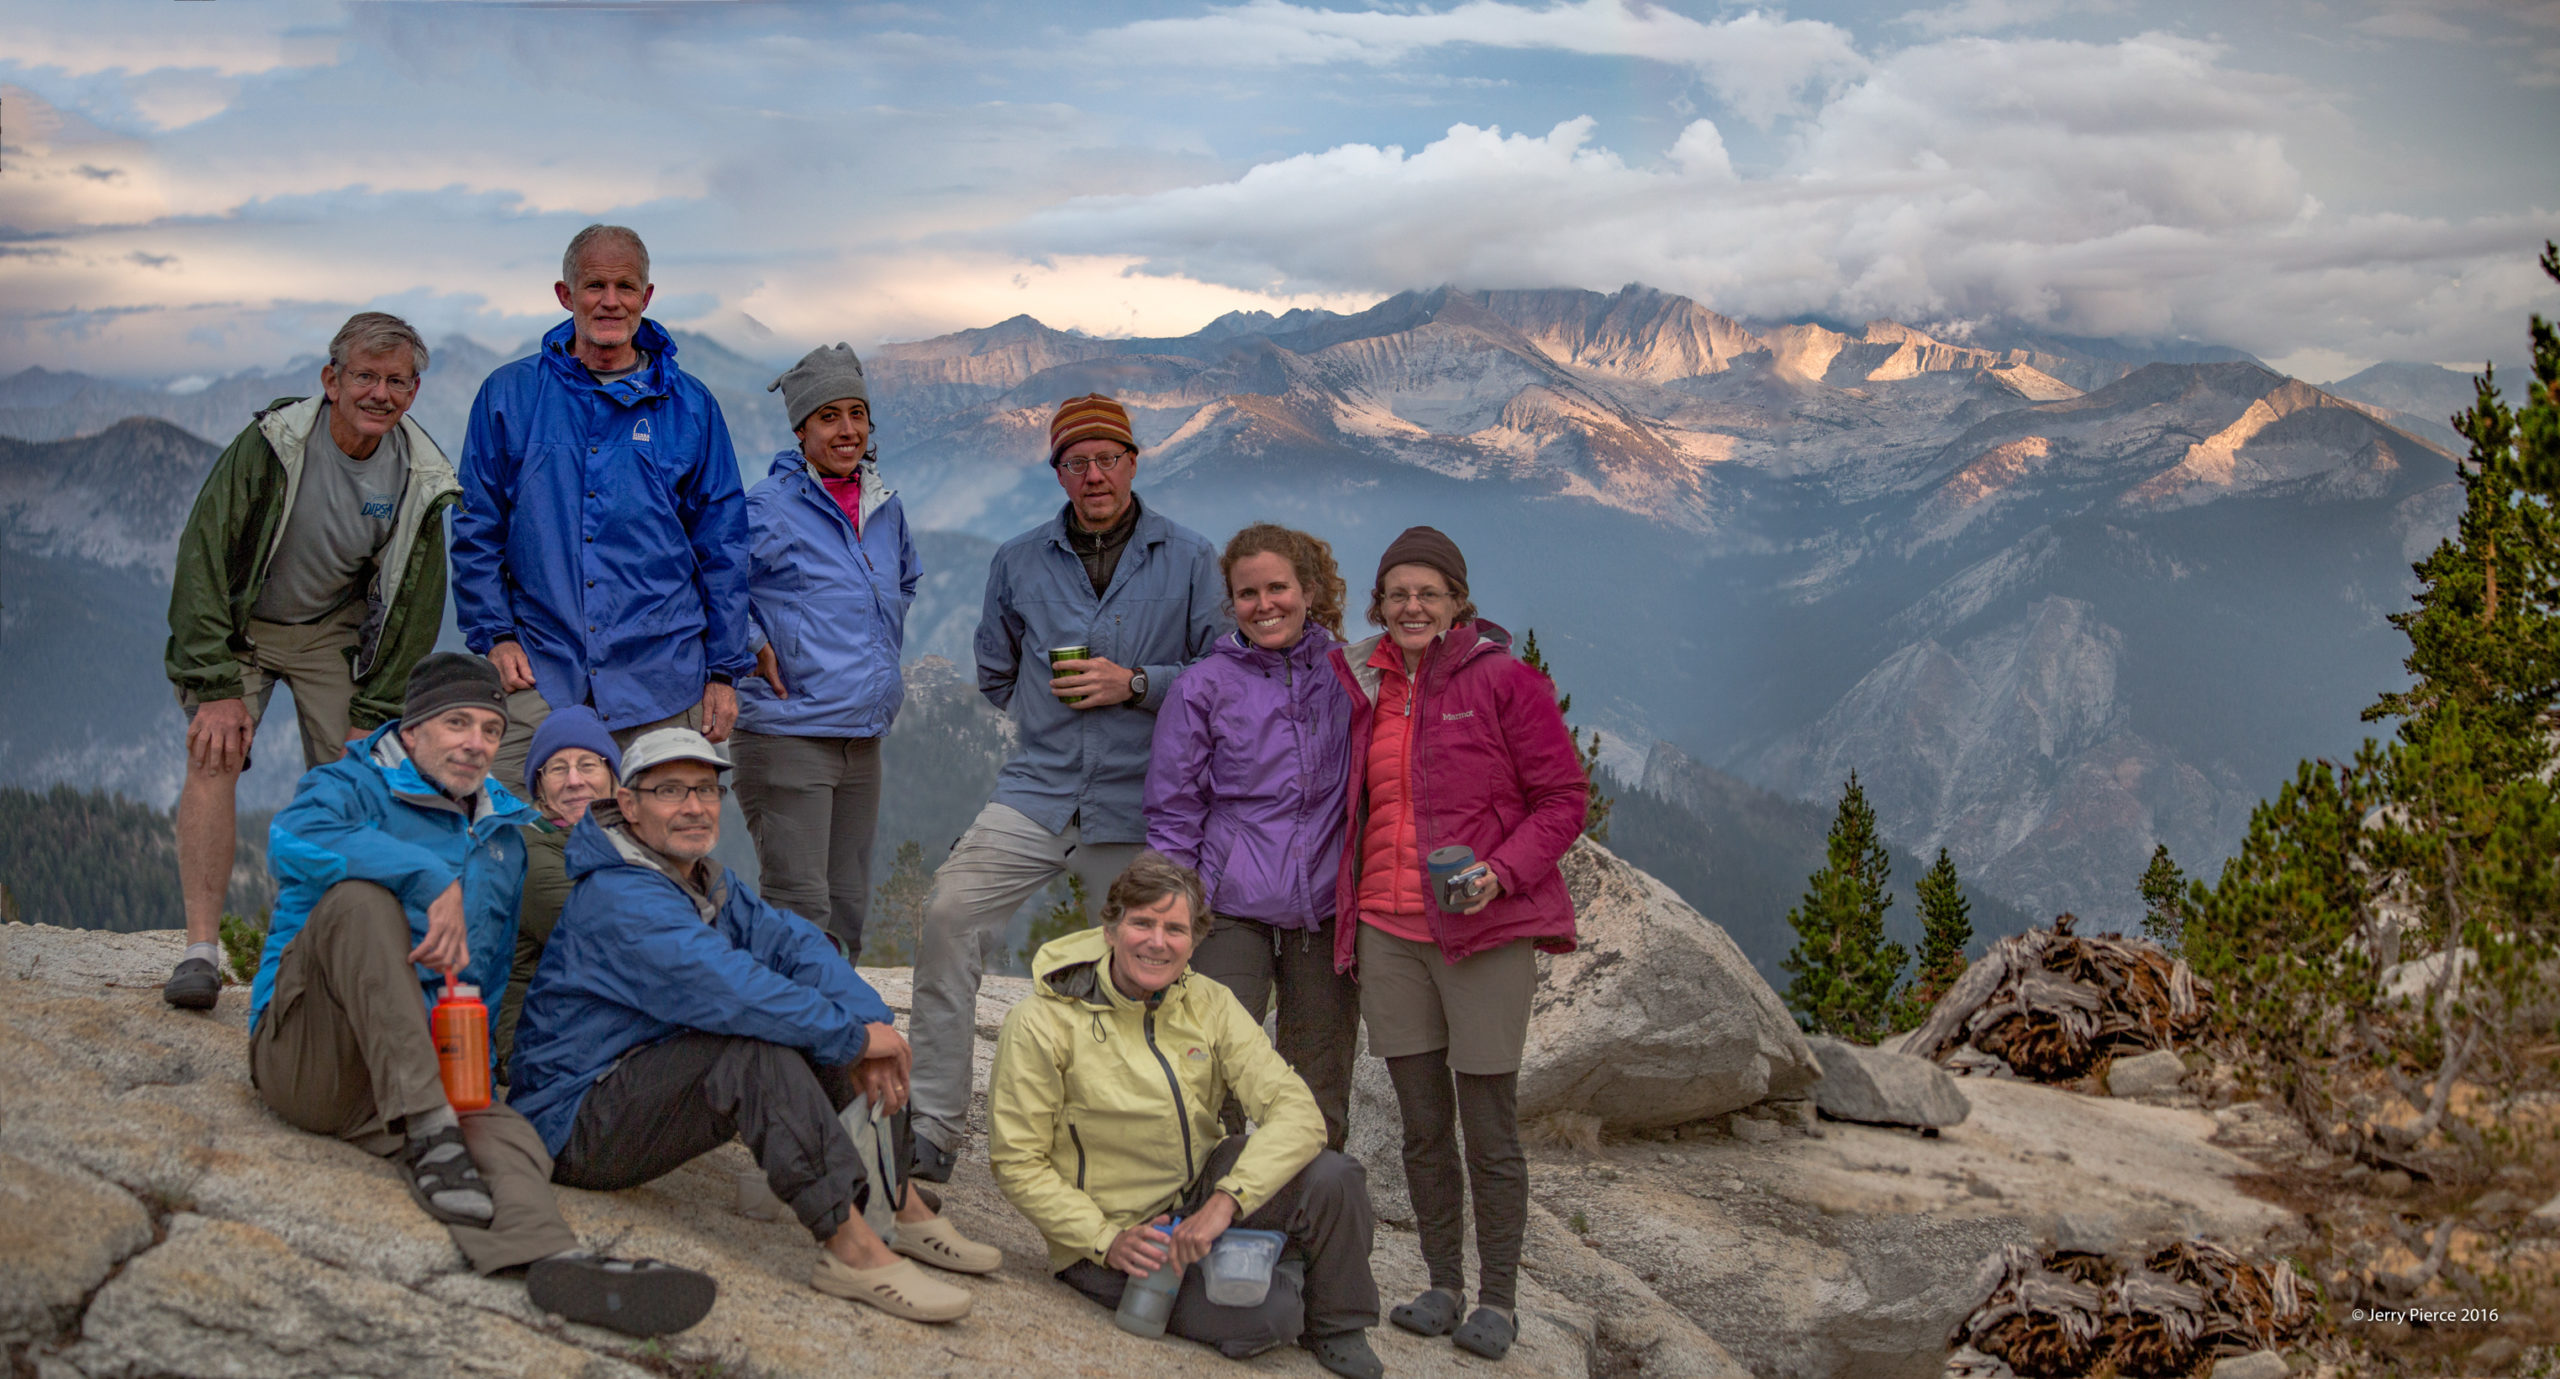
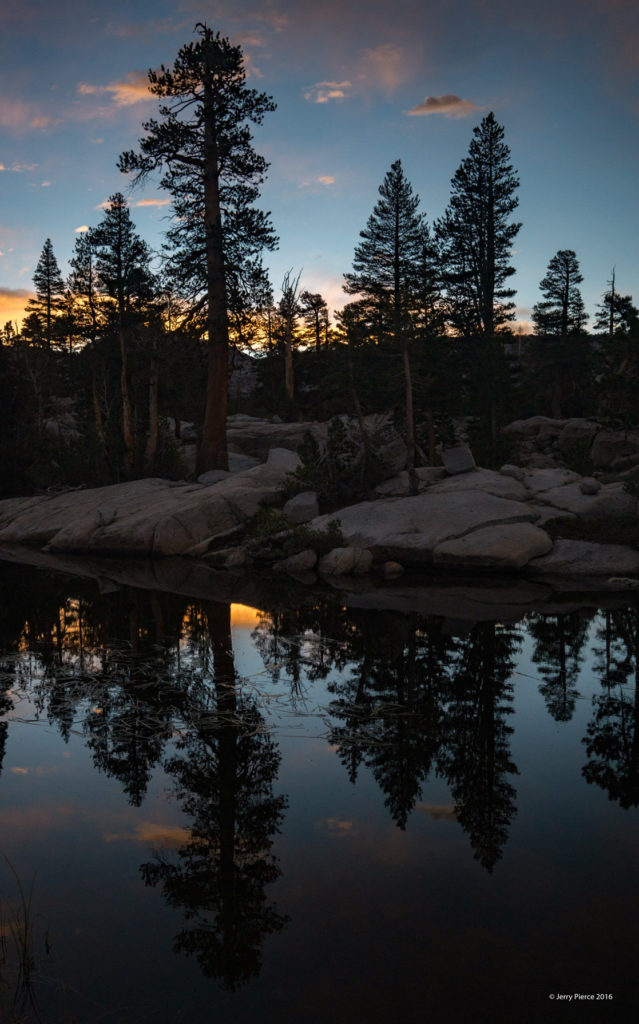
And then you get to see sights like this after dinner. One of my favorite campsites in the sierra – Grouse Lake. About 8 miles up 4,000 ft climb in Kings Canyon – off trail. This photo has been photoshopped to allow both the people and the background to be in focus. Two pictures combined together – the eye saw it right, the camera needed some help…
Electronic Stuff
Rechargeable Flashlight
The “brick” is the elephant in the bag … almost 1 pound!!
Why not solar power????
I’m heavy on electronics. My heavy items are 1) power brick and 2) camera. Other little stuff as well.
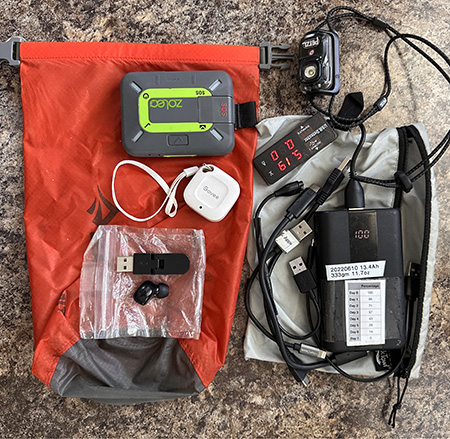
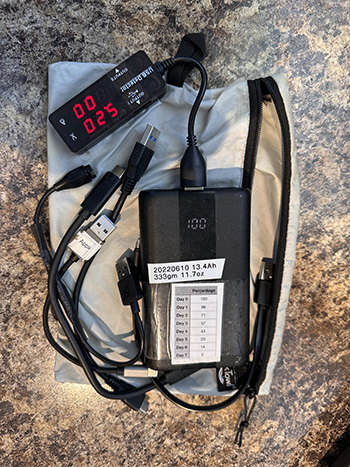
Starting with the brick – I bring a 20,000mAH brick. https://www.amazon.com/gp/product/B09FK2VWKW/ I bring a batch of wires: USB-A to Garmin, USB-A to USB-C, USB-C to USB-C, USB-A to USB Mini, USB-A to Apple-Lightning. And the headphone has its own USB-A plug in. I also bring a volt/power meter that supplies two devices – but it’s not JUST because I’m a nerd. The brick is “smart” and will stop charging when the current draw is low – which means it doesn’t recognize the watch/headphone when they are close to being filled so I need to charge the iPhone at the same time/through the same plug as the watch/headphone so they will charge fully. Silly, but necessary. Most of my devices can be recharged (satellite modem, head lamp, camera, watch, lighter), a few non-critical items use a fixed battery so can’t be recovered. You can see that I have a count-down on the battery for me to judge how I’m doing for use of power. Power management is a real thing. It’s really important to have a percentage showing on the brick. Just 4 lights is too little information. I keep looking for smaller / more efficient bricks, but this one was my latest. A quick note: it is listed as a 20,000mAH, but when I measure it using a power meter and a 1A 5VDC load is measures as 13,400mAH. This is not a big deal (see section below), but it is very important that you understand *your* actual power requirements and not look at absolute specs. I don’t need a bigger capacity battery, I would LOVE a lighter one.
Solar vs Brick
Power Use:
iPhone 20% per day or {20% times 2,800mAH} = 560mAH / day
Garmin forerunner 955 – 50% per day or {50% times 380mAH} = 200mAH / day
Canon EOS-R50 15% per day or {15% times 2,000mAH} = 300mAH / day
HeadLight 10% per day
Earphone 10% per day
Total of 1.4 AH/day to meet my needs
7 days = 10AH
Bottom Line: Brick slightly heavier and much more convenient.
It took me a long time to figure out how much power I needed and what it took to meet those needs. Bottom line I use about 1.4AH/day – most of which goes to my all-important navigation tool the iPhone. So for a 7 day hike I need a total of about 10AH. A brick holds 14AH so that does it all. Solar takes too much time in direct sunlight to do any good. (If you see someone hiking with a solar panel on their back, it’s just for show. You really don’t generate that much power when in and out of shade.) So given same weight and more convenient it’s brick for me.
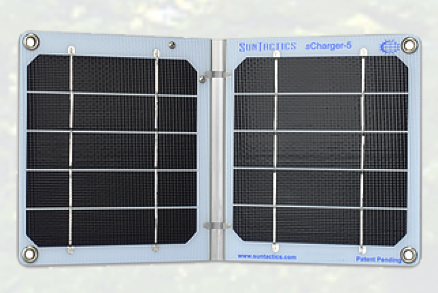
Solar takes about 2 hours direct sunlight to achieve about 1.2AH
Weight (including small battery): 0.88 pounds
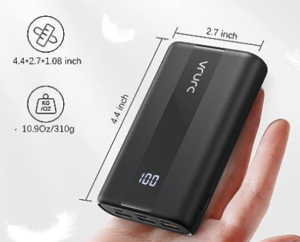
Brick holds about 14AH
Weight: 0.91 pounds
Communication
NEED to send “all OK” message once a day
Spousal unit requires it
Emergency communication
Satellite only way
I have been using satellite communication for a number of years now and it’s really a great safety accessory. My wife now demands that I use it – both so she knows I’m OK and that I can get help if needed (I’ve never needed it).
I now only use the iPhone since with iOS18 it allows both emergency and text communication.
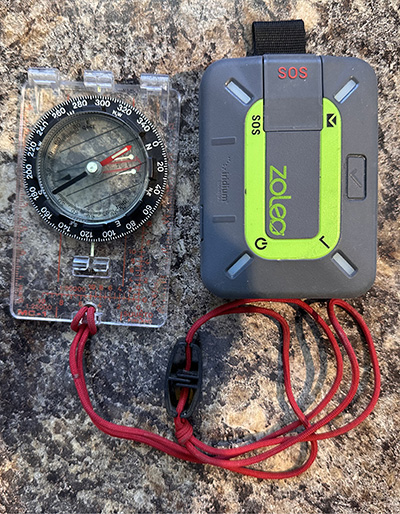
I moved to a Zoleo satellite communicator. It’s bigger and heavier than the Garmin Mini and has about the same performance. I think it’s slightly less expensive, but the big win is that when cell/wifi service is available it uses that to send/receive messages. The unit is less expensive and the all-important plans (the real cost) are about the same. During hiking season I pay the $35/month for 200 satellite messages and for off season I play the $5/month keep-the-account subscription charge. So my total for the year is about $150. They have improved their weather predictions as well.
BIG CHANGE. The new iPhone operating system can sent texts out over the satellite!! (Assuming you have an iPhone14 or newer.) IT WORKS!! I now don’t bring the Zoleo and have cancelled my subscription. I also don’t bring a compass anymore. The phone navigation works fine. (BTW someone else in our party always carries a different satellite system – generally InReach – so we always have a backup.
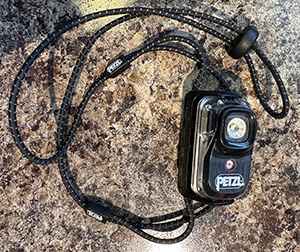
I bring a small headlamp. It is USB rechargeable and can provide dim light, bright light and red light. I like the strings and the ability to hang it from my neck – not always on my head. It just works and is lightweight. I’m sure there are lots to choose from. https://www.amazon.com/gp/product/B076ZTCLJQ
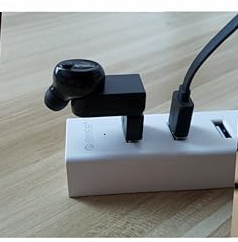
I like to listen to podcasts and books. Sometime to help me sleep and rarely when hiking a really boring trail. I bring a tiny FocusPower F10 Mini Bluetooth earbud. https://www.amazon.com/gp/product/B01M2ZOLLP/ Not great quality, but easy to bring and use.
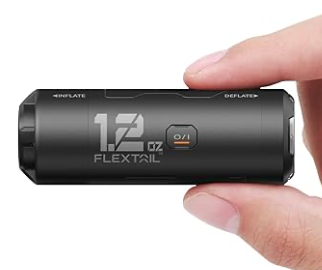
I got an airpump for mattresses and to use on a fire. FLEXTAILGEAR Zero Pump. So light weight and I always have the right pressure in the mattress.
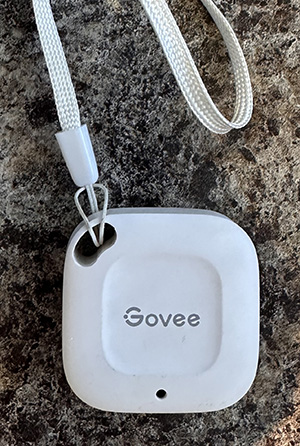
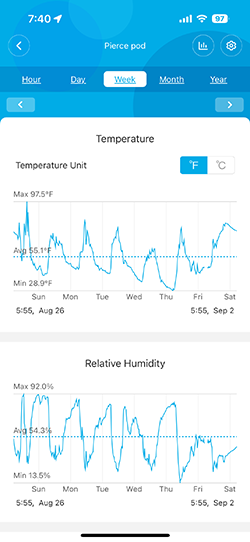
Did it freeze last night? What is the temperature? I used a IR temperature probe for a long time, but now I’m using a bluetooth temperature recorder. It’s really nice! https://www.amazon.com/gp/product/B07R586J37 It only cost about $15 and gives a record of temperature. The chart shows our temperature profile for our 7 day hike in the White Clouds! It DID get to freezing the one night! I hang the sensor outside my tent overnight. Another fun gadget.
| Electronics | Grams | Pounds | Ounces | ||
| Flashlight (usb rechargable) | 1 | 33 | 0.07 | 1.2 | 0.07 |
| Headphone (USB rechargeable) | 1 | 12 | 0.03 | 0.4 | 0.03 |
| Satellite receiver/transmitter | 0 | 150 | 0.33 | 5.3 | 0 |
| Wires and Bag | 1 | 72 | 0.16 | 2.5 | 0.16 |
| Battery Brick | 1 | 312 | 0.69 | 11 | 0.69 |
| Temperature Sensor | 1 | 23 | 0.05 | 0.8 | 0.05 |
| Air Pump | 1 | 59 | 0.13 | 2.1 | 0.13 |
| Waterproof bag | 1 | 24 | 0.05 | 0.8 | 0.05 |
| Total | 685 | 1.51 | 24.2 | 1.18 |
Camera and Accessories
So the real question is: Do I hike to take pictures or do I take pictures to hike? For me taking pictures is the primary goal of going out on hikes. I have cycled through LOTS of cameras over the years. I started with a Canon 5DM3 (boy is that heavy), then a Sony A6000, then a Fujifilm X-T2, Canon EOS R5 (still my primary camera) then a Sony RX100 VII (which WINS the weight category, but isn’t very water resistant and a pain to set up). Now a Canon EOS-R50 with an 18-150 lens. I’ll bring a very small tripod for group photos and astrophotography.
Of course I also bring an iPhone 14pro that has a damn good camera in it. AND the new operating system lets me take RAW photos with the iPhone and transfer them in Adobe Lightroom. But I STILL take a real camera with me…
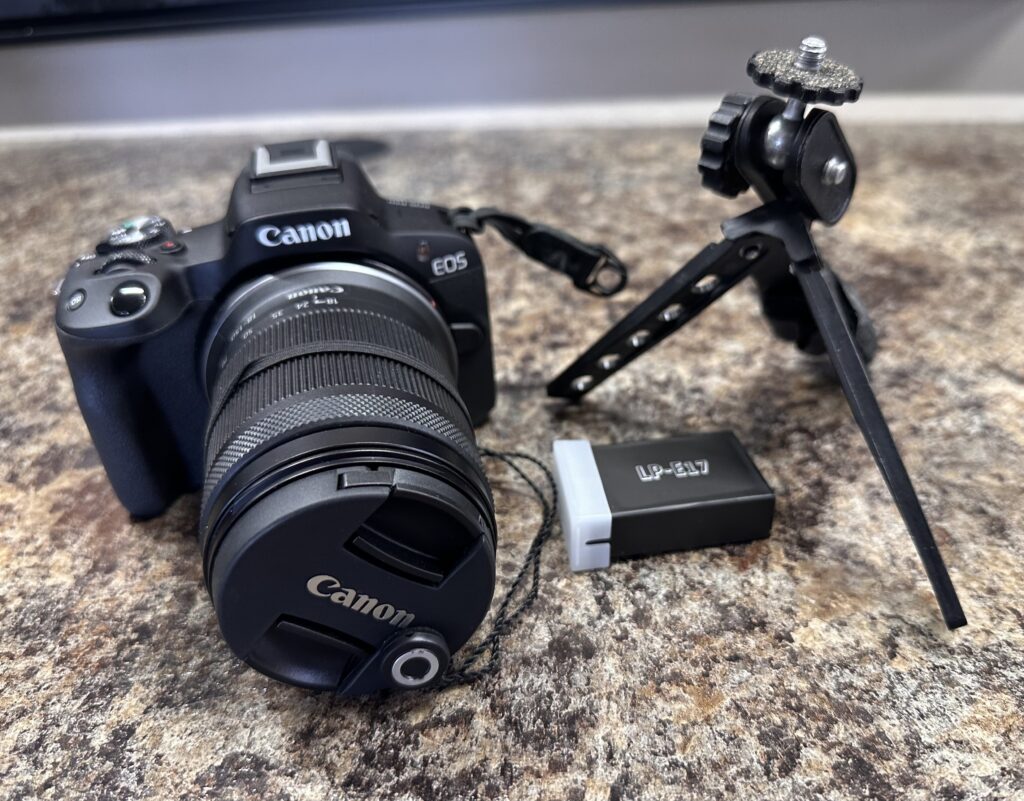
So new this year is the Canon EOS R50. The total weight went from 1.06 pounds to 1.70 pounds. Still heavy, but overcomes the issues with the Sony RX100. I will know more at the end of the year… Result is in … I love it! The quick zoom and better viewer makes up for the weight. Also I don’t need to bring an external intervalometer, the iPhone has an App that does it all for me! I probably only need to bring one battery since it is pretty good at power control and I can re-charge with my brick.
| Camera | Grams | Pounds | Ounces | ||
| Canon EOS R50 and 18-150 lens | 1 | 696 | 1.54 | 24.6 | 1.54 |
| Tripod | 1 | 46 | 0.1 | 1.6 | 0.1 |
| Battery | 1 | 28 | 0.06 | 1 | 0.06 |
| 0 | |||||
| Total | 770 | 1.7 | 27.2 | 1.7 |
Non-Electronics Small Stuff
There are a batch of odds and ends that go with me every time. I carry a “hikers wallet” – a snack bag with my ID, a little cash, a credit card, my medical cards and emergency cards. My spare progressive glasses for in-camp, a slightly larger (but still very light) towel to dry off after swimming and/or to soak to put around my neck when it’s hot. A small face towel as a handkerchief plus. Some extra connectors (safety pins, strings, small carabiners). Some lens wipes for my glasses and the camera. The knife is a really small multi-purpose knife – only has a blade, scissors, nail file and tweezers. https://www.amazon.com/Victorinox-Swiss-Classic-Pocket-Knife/dp/B00004YVB2
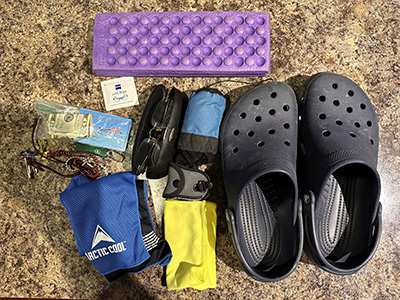
Crocks are the go-to in-camp shoes. I like them since they can be slippers (strap up and not around the heel) for getting up at night to pee or use the heel strap when river crossing and the shoes should NOT come off. The bottoms are “sticky” enough for day-walks on granite. They can dry really fast after stepping in water. I know there are some lighter ones, but for me these continue to be my go-to shoes. I bring a mechanical compass for just-in-case my electronics fail. I also bring paper maps of our trip.
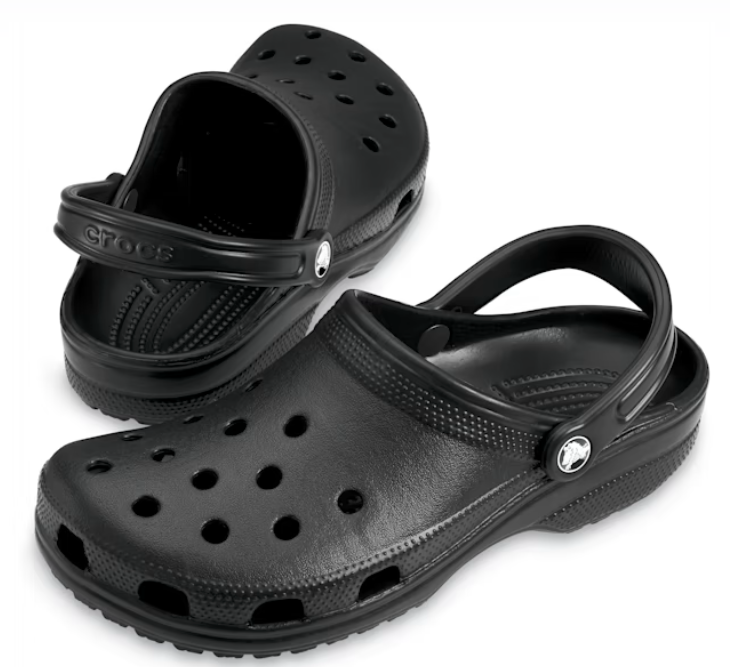
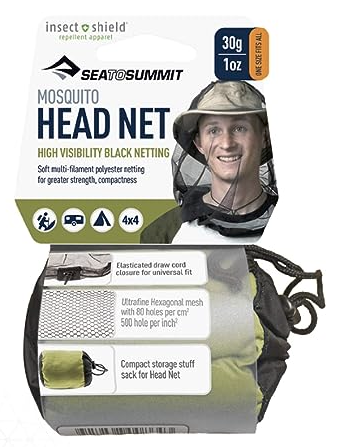
We ALWAYS bring a head net. It is a pain to use, but bugs are a reality for almost every trip. Guaranteed if you wear it you WILL try and eat/drink something without removing it.
I also bring a very light weight day pack. This is my tent storage bag. I never do a day hike and carry my tent! I can put water inside the pack for day hikes. Better than bringing my big pack to the top of a hill… https://www.amazon.com/Sea-Summit-Ultra-SIL-Nano-Pack/dp/B07LB4ZSVP

| Non-Electronics in Backpack | Grams | Pounds | Ounces | ||
| Knife | 1 | 23 | 0.05 | 0.8 | 0.05 |
| Compass | 0 | 50 | 0.11 | 1.8 | 0 |
| Reading Glasses | 1 | 39 | 0.09 | 1.4 | 0.09 |
| $$ / Driver’s license | 1 | 20 | 0.04 | 0.7 | 0.04 |
| Pens/Paper/Lens cleaner | 1 | 20 | 0.04 | 0.7 | 0.04 |
| 0 | 0 | 0 | |||
| Laundry Line | 0 | 26 | 0.06 | 0.9 | 0 |
| Mosquito Net Hat | 1 | 26 | 0.06 | 0.9 | 0.06 |
| Strings and connectors | 1 | 33 | 0.07 | 1.2 | 0.07 |
| Crocks (water shoes/in camp) | 1 | 376 | 0.83 | 13.3 | 0.83 |
| Towel large | 1 | 46 | 0.1 | 1.6 | 0.1 |
| Towel small | 1 | 15 | 0.03 | 0.5 | 0.03 |
| Total | 674 | 1.49 | 23.8 | 1.32 |

But the resultant images make it all worthwhile. This was taken in Sequoia National Park at sunset two years ago. We had just had an encounter with a ranger who threatened to give us a ticket ‘cause she didn’t like how we were tying up our food at night. A very unpleasant person, but what a great place to camp! What was she complaining about?
BEARS!!
We had not carried bear canisters, we were tying up food at night in an alternative means of protection, an Ursack. It was to hang food at that park, she just didn’t like it.
Most places require outrageously heavy bear canisters. These 2.6 pound monsters are designed to be bear proof so all your smelly things, from toothpaste to dinners go in the canister and the canisters are placed on the ground away from the campground at night. They make for in-camp chairs – well there’s one benefit. This has been going on for many years and bears no longer see humans as sources of food, so they avoid us as much as we try to avoid them. It’s heavy and there are better options, that Ursack I mentioned, but they are not approved by the park department (yet).
Rules for most remote areas in California require the use of a Bear Canister
VERY heavy, hard to pack, marginal use as a chair (Better with the seat pad). Bears can’t open these. I have seen bears in the wild. Swimming nearby, eating berries, walking around. One walked through our camp.
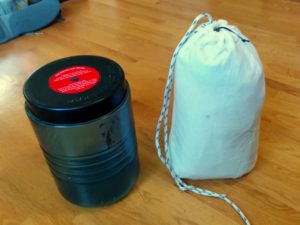
I have both of these bear-resistant containers. On the left is a BV500 can. It’s a pain to open when cold and I much prefer the Bearikade bear canister – but it costs well over $400 and only saves a few ounces, so not worth it. On the right is a Ursack that is much better, but it doesn’t pass the bar in most high Sierra forests (requirement). We use the Ursack when we can and we are not forced to use a canister. In all cases you don’t want to sleep with your food – bears OR animals – rats, porcupines, etc.
Other Optional Stuff – That I normally bring
I sometimes bring an additional layer for chilly evenings. Recently I have not needed it and/or I put in a very lightweight T-Shirt if it’s going to be warm. Remember you need long sleeve for mosquito protection!
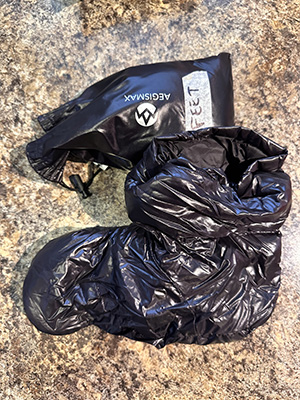
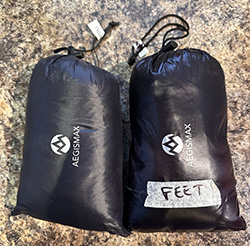
Keeping your head / feet warm is a priority. These very lightweight down puffy additions are a great way to deal with colder weather. If predictions are for below freezing on the trip, I bring these. They are VERY fragile. And cheap! The ones I purchased don’t seem to be there on Amazon – search for down booties.
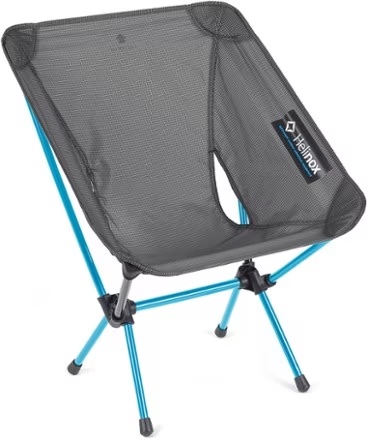
Camp Chair https://www.rei.com/product/216468/helinox-chair-zero-l I will be hiking with this next trip. I used it and found it was really good to sit in and to hold my backpack when I’m loading/unloading it. What can I say… I like it!
Other Optional Stuff – That I normally DON’T bring
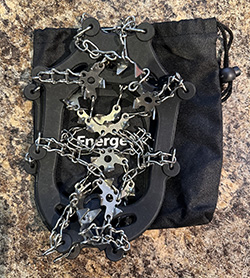
Microspikes are sometimes needed if there’s snow around. These are lighter than crampons, but still provide some grip. I don’t think I have ever USED them on the trail, but I will still bring them if conditions seem to need it.
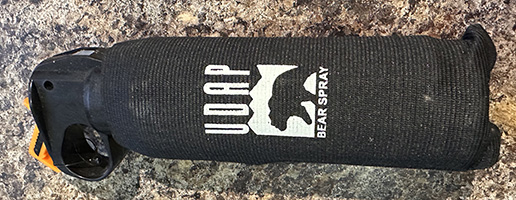
Some locations with grizzlies REQUIRE you to bring Bear Spray. Then again they are OUTLAWED in California (no grizzlies and they are considered a weapon).
| Optional Non-Electronics (likely) | Grams | Pounds | Ounces | ||
| Tech Shirt (optional) | 1 | 303 | 0.67 | 10.7 | 0.67 |
| T-Shirt (optional) | 0 | 134 | 0.3 | 4.7 | 0 |
| Bear Canister BV500 | 0 | 1,155 | 2.55 | 40.8 | 0 |
| Chair | 1 | 518 | 1.14 | 18.3 | 1.14 |
| Down Shoes | 0 | 79 | 0.17 | 2.8 | 0 |
| Down Cap | 0 | 81 | 0.18 | 2.9 | 0 |
| Total | 2,270.00 | 5.01 | 80.2 | 1.81 | |
| Optional Non-Electronics (Not likely) | Grams | Pounds | Ounces | ||
| Microspikes | 0 | 388 | 0.86 | 13.7 | 0 |
| Ursack | 1 | 238 | 0.53 | 8.4 | 0.53 |
| Umbrella | 0 | 192 | 0.42 | 6.8 | 0 |
| 1/8” pad | 0 | 41 | 0.09 | 1.4 | 0 |
| Bear Spray | 1 | 358 | 0.79 | 12.6 | 0.79 |
| Total: | 1,217.00 | 2.69 | 43 | 1.32 |
Cooking (Common Gear – split with 3-4 people)
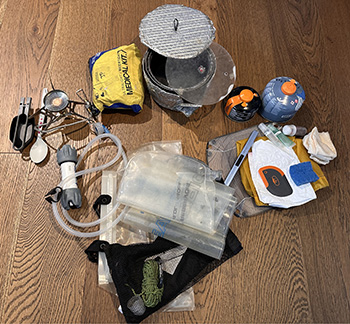
Common gear is food, cooking, medical and water supplies. We normally bring two pots, a primary stove and cooking utensils. We also bring the group filtering stuff which in a pinch can carry 12 liters of water from a remote location to a dry camp. The split with 4 people means about 1.0 pounds per person for the common hardware.
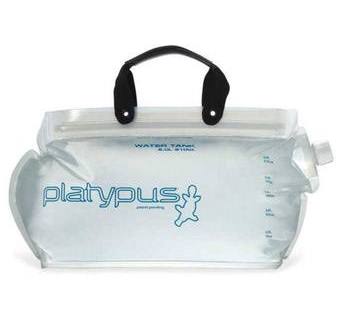
Things have changed. We now only bring a 4 liter Platypus Water Tank and no group filter. We each bring our BeFree filter and we all do filtering as needed for cooking and our own use. https://www.amazon.com/Platypus-Water-Tank-4-Liter/dp/B001XM6ILE
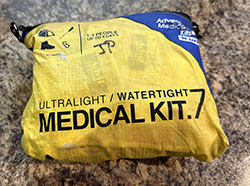
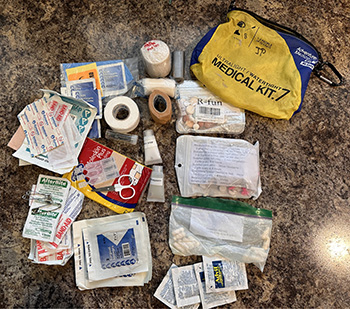
For medical we start with a bag and add stuff. We bring LOTS of pills – from Advil to OxiContin, Benadryl and Imodium. Add Leukotape and Moleskin and you have a bag that we have never needed in all our hiking. Absolutely essential and happy we have not used.
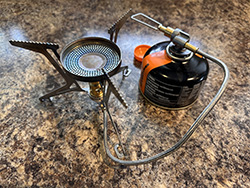
We have moved to a Soto Fusion Compact Stove with micro regulator. I really like that the tank is not directly connected to the stove and it gives it better control over location on the ground. This allows simmering with the fine control. It gets hot really fast https://www.amazon.com/gp/product/B09NXWKRR5 Our usage of fuel is normally about 0.5 oz per day per person so a 7 day 4 person hike only requires 14 oz of fuel. We bring two 8 oz containers. For safety we assume 0.75 oz/day/person for calculations. I always like to bring two containers, even if we predict we can get away with one. It gives us an indication how we are using the fuel. I also like the remote tank so we can turn it upside down in really cold weather. That way the fuel can make it out in those rare situations.
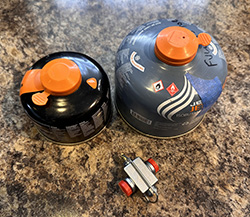
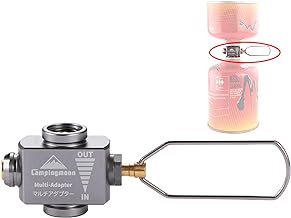
Plain old Isobutane fuel. BUT something new! They now sell a transfer valve that can move fuel from one tank to another. I now just buy the 16 oz cans of fuel and re-fill my collection of empty fuel canisters! Finally I don’t need to throw out half used cans! You need to know how much a full can weighs and be very careful (you can over fill!), but I love it! https://www.amazon.com/Campingmoon-Inflation-Pressure-Outdoor-Accessory/dp/B07SZLM17Y (My 3.5oz can full is 194g, my 8.11oz can full is 356g)
I have a collection of light weight titanium pots from 1+ liter, 1.5+ liter, 2+ liter and others as well. We make cozies out of insulation purchased from Home Depot – light weight and lasts a few seasons. We generally take two pots that nest together, but only if we have meals that require two. We check how much we need to boil and size appropriately. I made a plastic cover that gives us a look to see if it’s boiling.
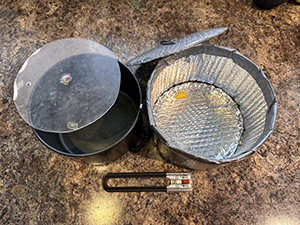
Food prep utensils are fairly straight forward. A carry bag, big spoon for stirring, a ladle for serving, a scraper for cleaning out pots, a piece of sponge for cleaning, a tube of soap and sanitizer, a Tyvek pad for spreading things out, extra matches, plasma lighter (see below). We *may* bring the dish as well next time.

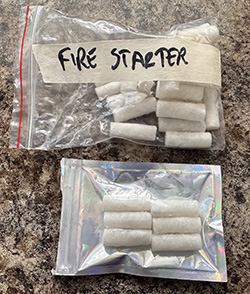
We bring a few fire starters (max of one a day). We look to see how many days we are camping at levels that allow fires and bring one per day – just in case. (Generally no fires above 10K feet altitude.) They make it so much easier to start a fire when we are lazy. https://www.amazon.com/gp/product/B09YMM19M8/
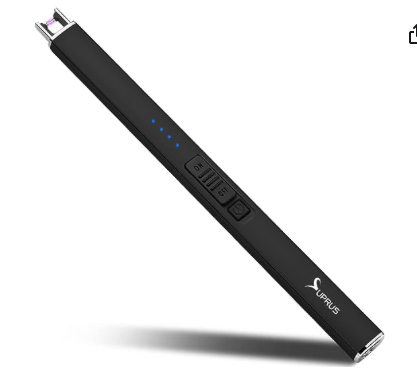
I bring a plasma lighter. https://www.amazon.com/gp/product/B098WQK4XJ/ It’s rechargeable and makes it SO much easier to light the stove. You can light it with the pot in place! This long one is better than the short one and it has a recessed tip when not in use. I did find that it only charges with USB-A to USB-C cable and not with a USB-C cable alone. VERY important to know when you bring your electronics!
| Common Gear | Grams | Pounds | Ounces | ||
| Isobutane Burner | 0 | 181 | 0.4 | 6.4 | 0 |
| Isobutane Fuel (4 oz can + 8 oz can) | 0 | 555 | 1.23 | 19.6 | 0 |
| Group Water Filter | 0 | 526 | 1.16 | 18.6 | 0 |
| Medical Kit | 0 | 336 | 0.74 | 11.9 | 0 |
| Fire Starter | 0 | 14 | 0.03 | 0.5 | 0 |
| Food Kit | 0 | 191 | 0.42 | 6.7 | 0 |
| Total: | 1,803.00 | 3.98 | 63.7 | 0 |
Food
Food is the last (and most important). It’s also the heaviest thing we carry (at least at the start of the hike). In general we consider it is about a pound a day per person of weight for food. The good news is that we lose that weight every day we hike, so our backpack gets lighter!!
We are not hungry on the trail! We do lose weight – I normally lose about 5 to 7 pounds on the first hike of the season, but we just don’t get hungry. We have begun to share meal duties – each of us brings one to three main meals for each hike. We all bring our own breakfast and lunches.
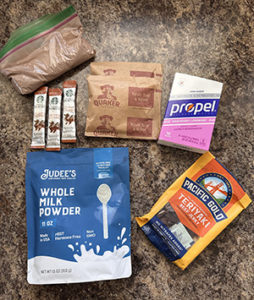
I bring two different kinds of breakfasts. Generally equal number of each. One is two packs of Quaker Instant Oatmeal – and I add a tablespoon of brown sugar and the second breakfast is Muesli with some instant whole milk. I keep the milk separate so I make hot milk and add the Muesli when ready. I also bring some coffee and creamer – I’m leaning to bringing some dry instant coffee, but my old standard was Starbucks VIA.
For lunch I have two tube of Propel electrolyte drink, 3 oz of salted Costco mixed nuts, 0.5 oz of jellybeans. I add a few slices of dried mango (Costco) and a packet of beef jerky. It comes to about 6 oz total for lunch. I repackage everything into snack bags.
| Meals | Grams | Pounds | Ounces | ||
| Breakfast | 100 | 0.22 | 3.5 | ||
| Lunch | 155 | 0.34 | 5.5 | ||
| Snacks/chocolate, coffee, lemonade, creamer | 35 | 0.08 | 1.2 | ||
| Main Meal / person | 200 | 0.44 | 7.1 | ||
| Per person/per day | 490 | 1.08 | 17.3 | ||
| Number of days | 4 | 1,960 | 8.65 | 138.5 | 4.33 |
Total Weight
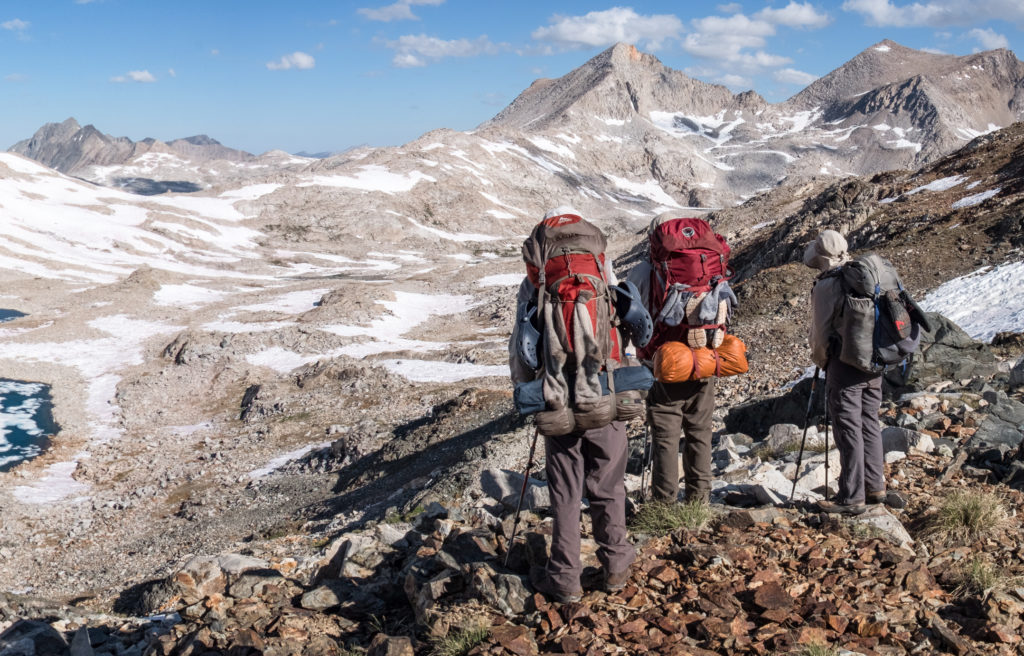
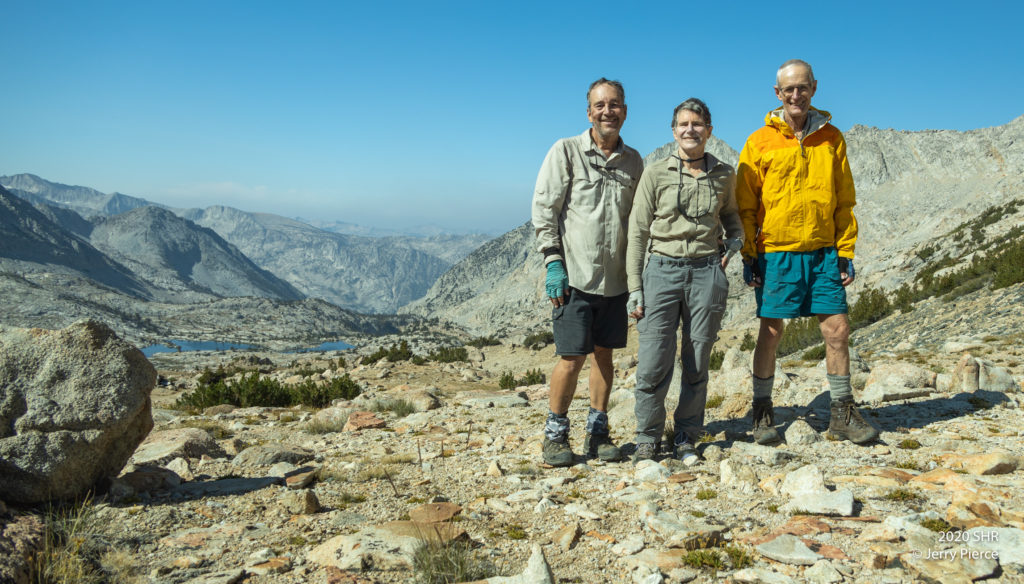
Then bringing it all together again – this give the breakdown of the 33 pounds of dead weight, not including my clothing and fat. The water and food are a hefty part of the weight and can vary depending on trail conditions, water availability AND how many days we have been on the trail. To say the least it’s a heavy load. The stylish backpacks in the picture are experienced hikers and they started between 30 and my 38 pounds at the start of this hike.
| Pounds Actual | |
| On Body | 7.3 |
| Clothing in Backpack | 2.02 |
| Puffy Coat | 0.66 |
| Wet Weather Gear | 1.37 |
| Tent | 1.74 |
| Backpack | 3.22 |
| Sleeping Bag Stuff | 4.07 |
| Water Gear | 0.63 |
| Poop Gear | 0.25 |
| Personal Food Stuff | 0.54 |
| Personal Toiletries | 1.34 |
| Electronics | 1.18 |
| Non Electronics | 1.32 |
| Camera | 1.7 |
| Base Weight: | 20.03 |
| Optional | 1.81 |
| Not Likely | 1.32 |
| Base Weight (Sierras) | 23.16 |
| Group Gear (assuming 4 people) | 1 |
| Food (8 days) | 4.33 |
| Water (2 liters) | 4.42 |
| On Back at start: | 32.9 |
